DIY Moulin Rouge Accessories!
The theme of my sister's bachelorette party this year was Moulin Rouge. Even though all the girls were planning to dress up, we didn't want to spoil the theme for my sister, so we just told her to get a normal party dress, and I was tasked with buying and/or making some accessories that could get her on-theme last minute.
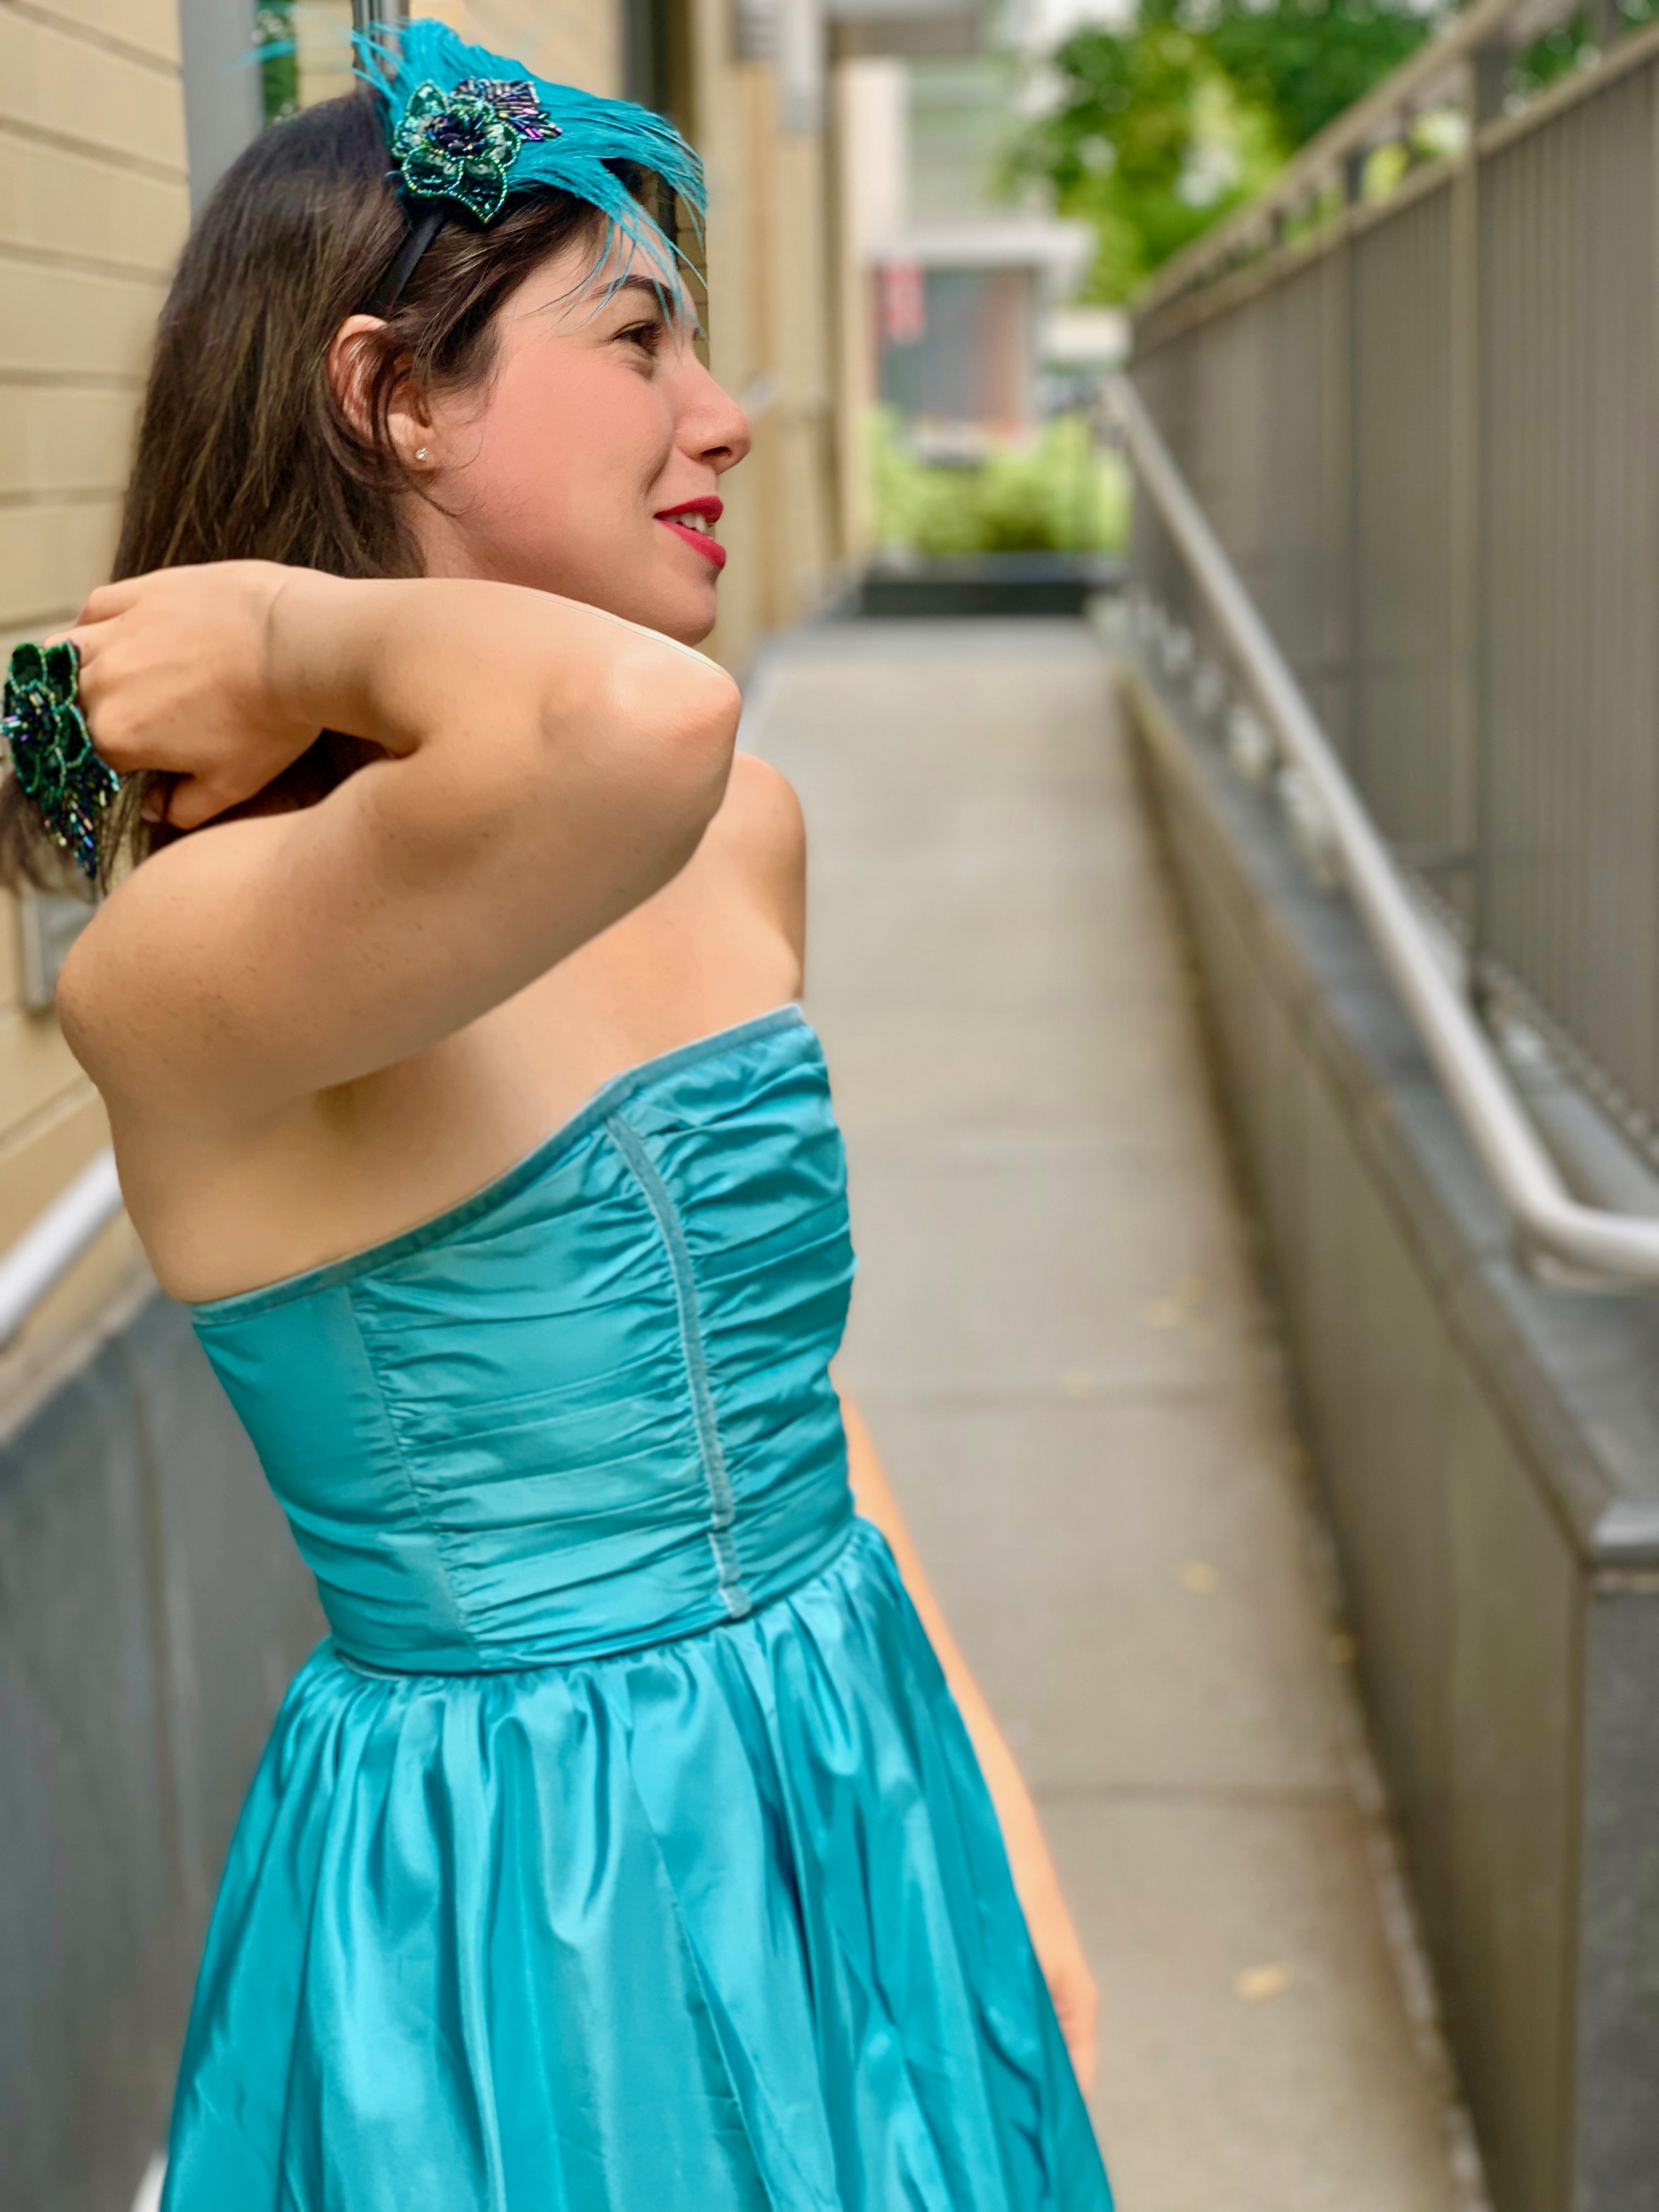
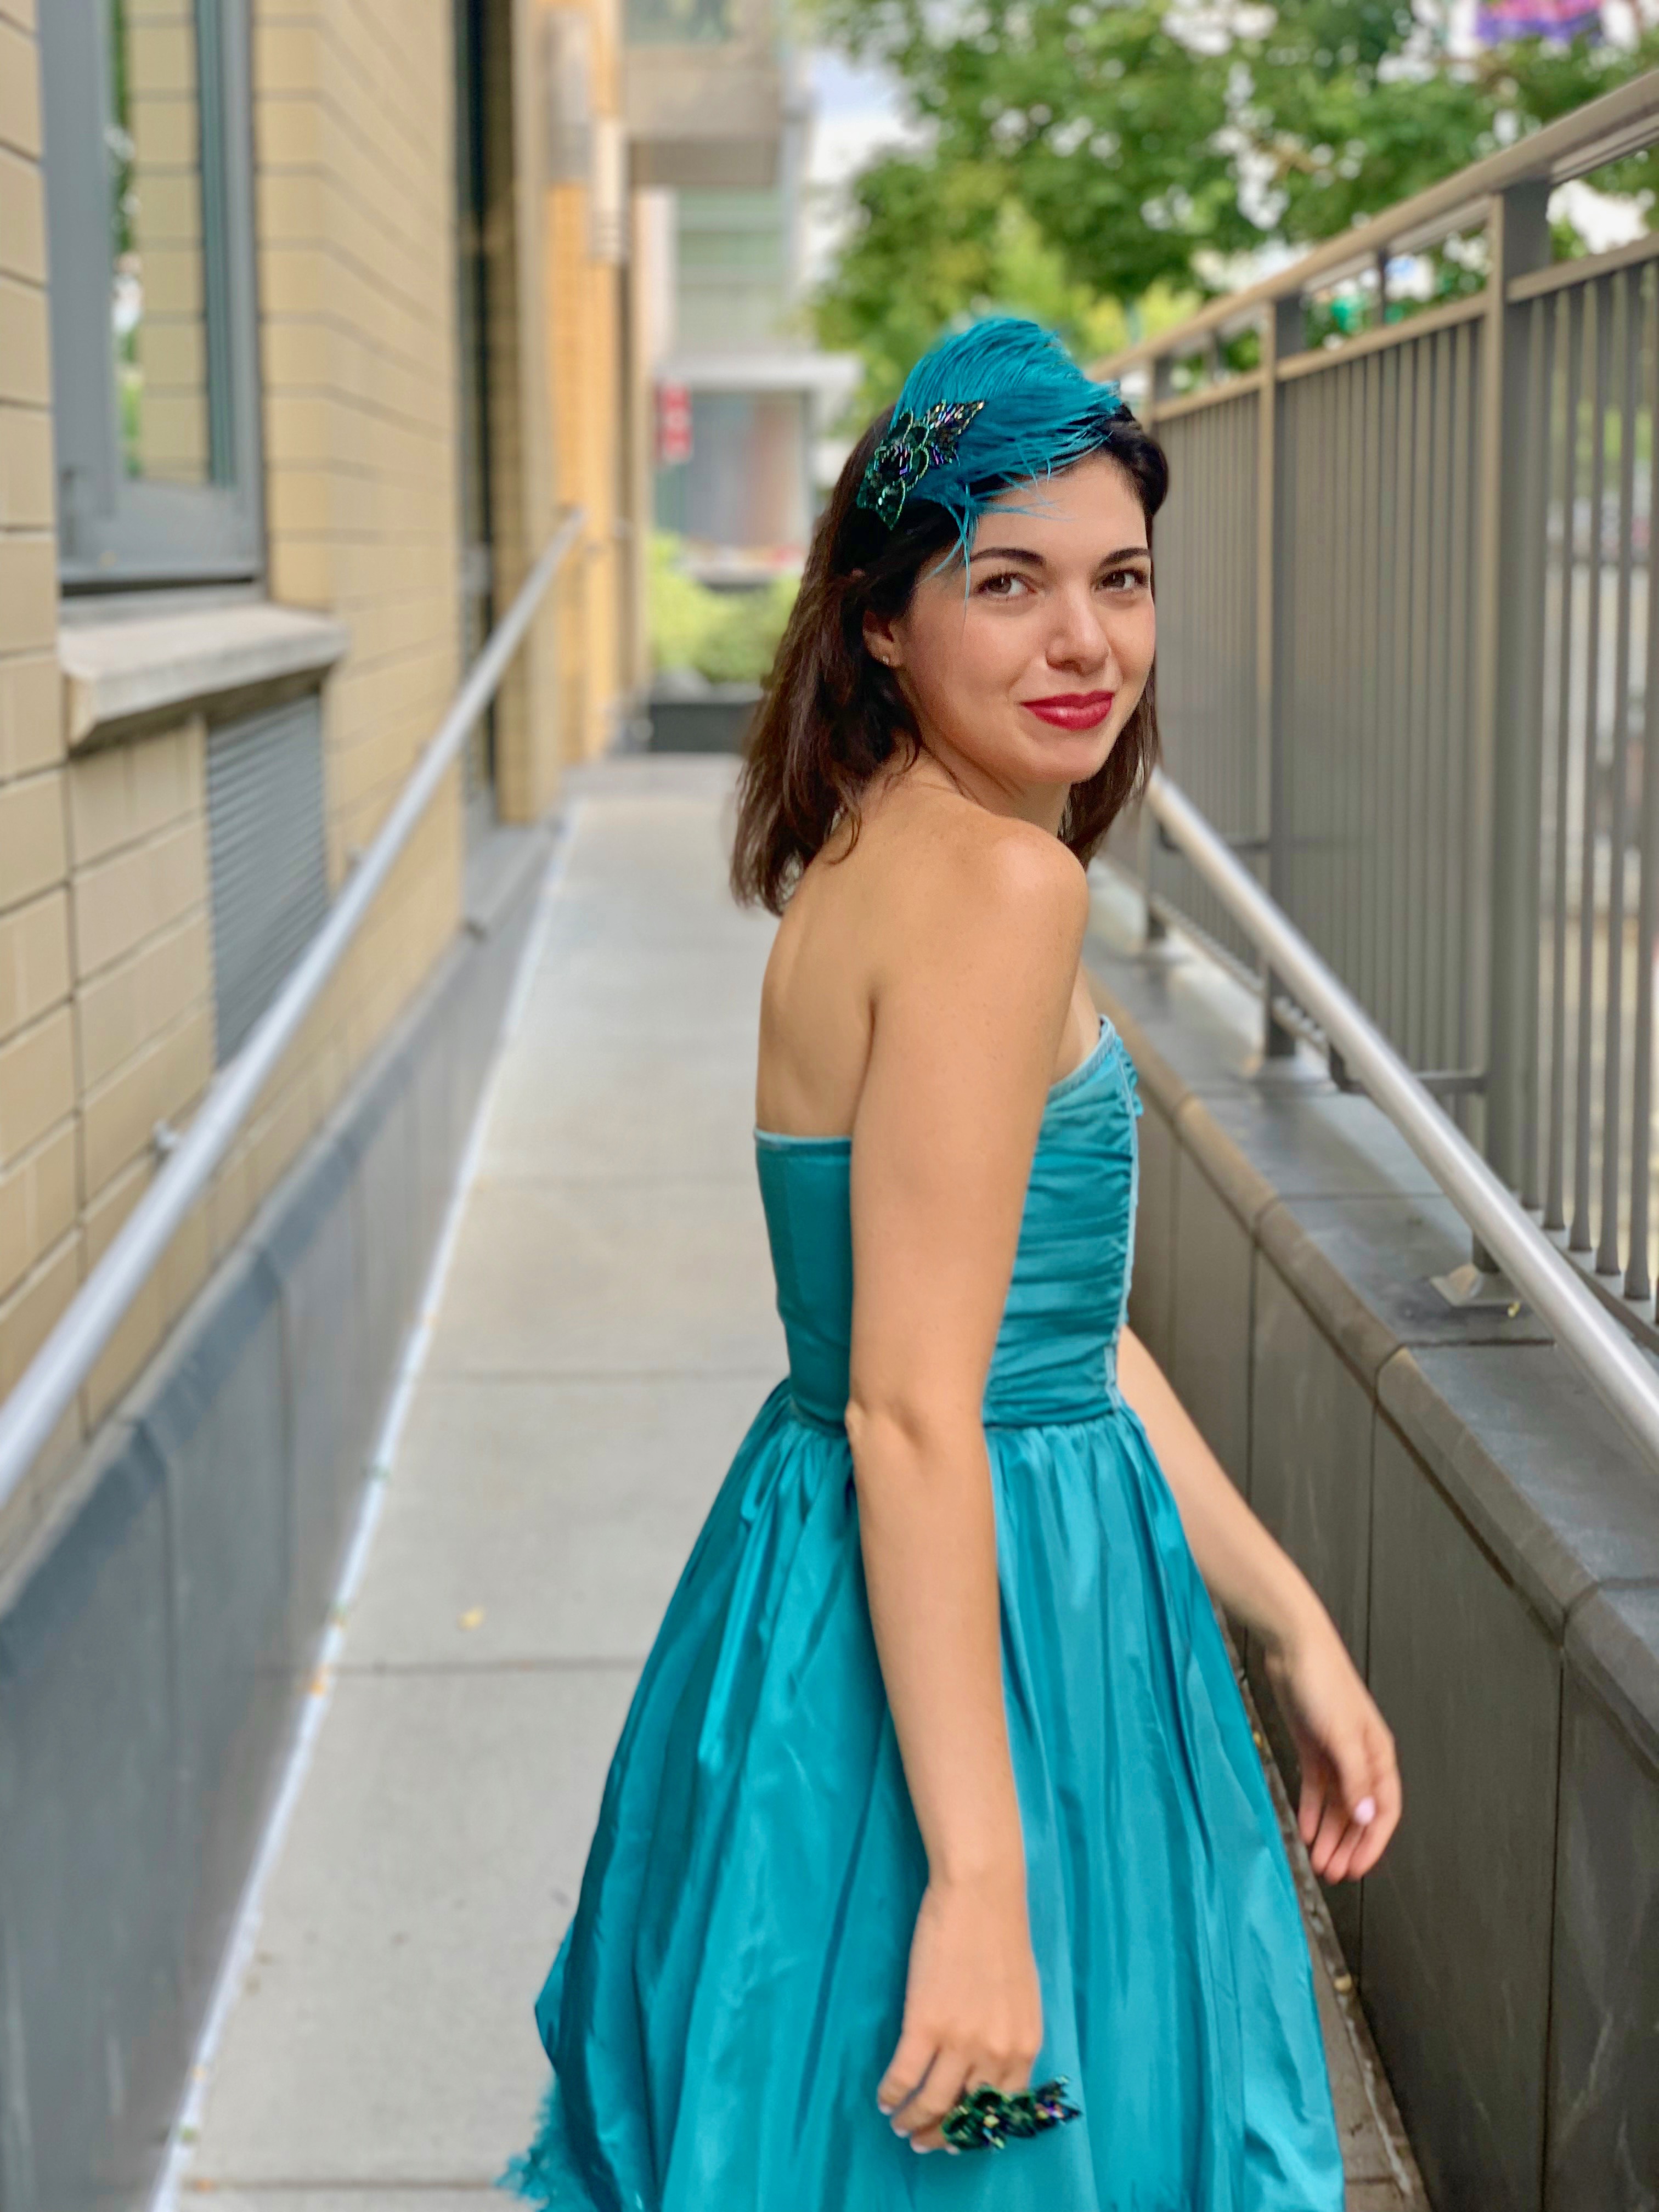
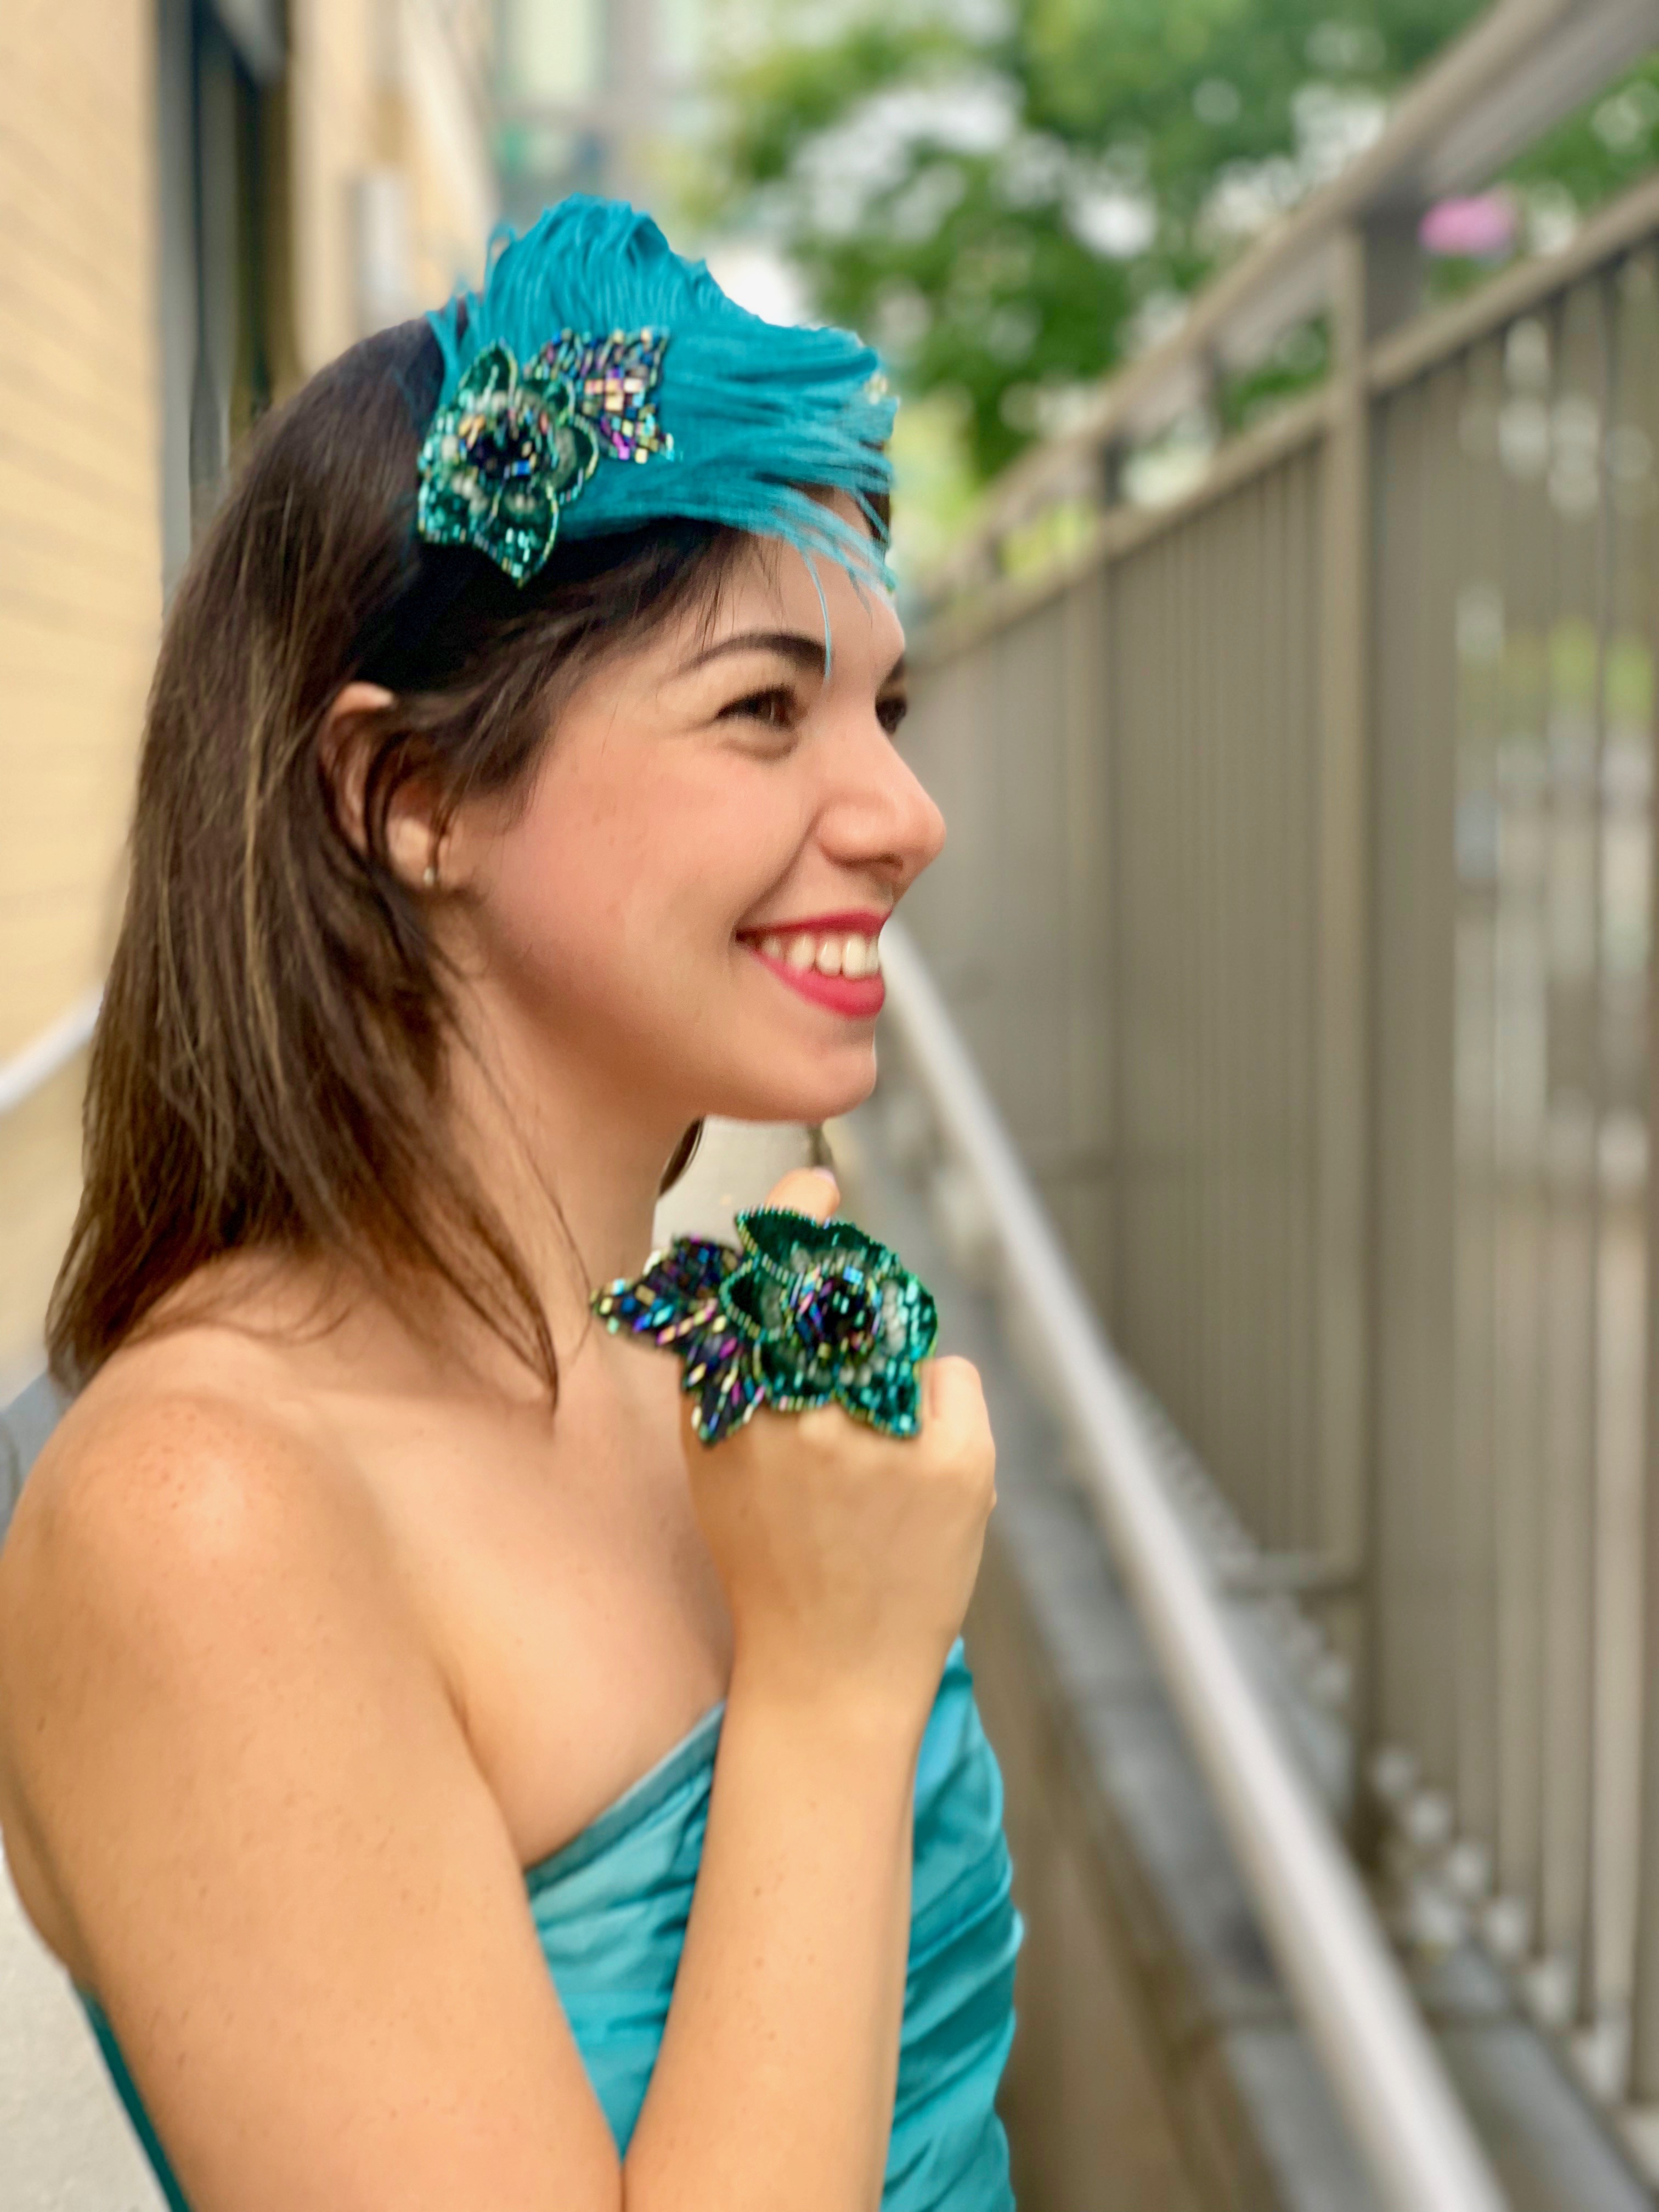
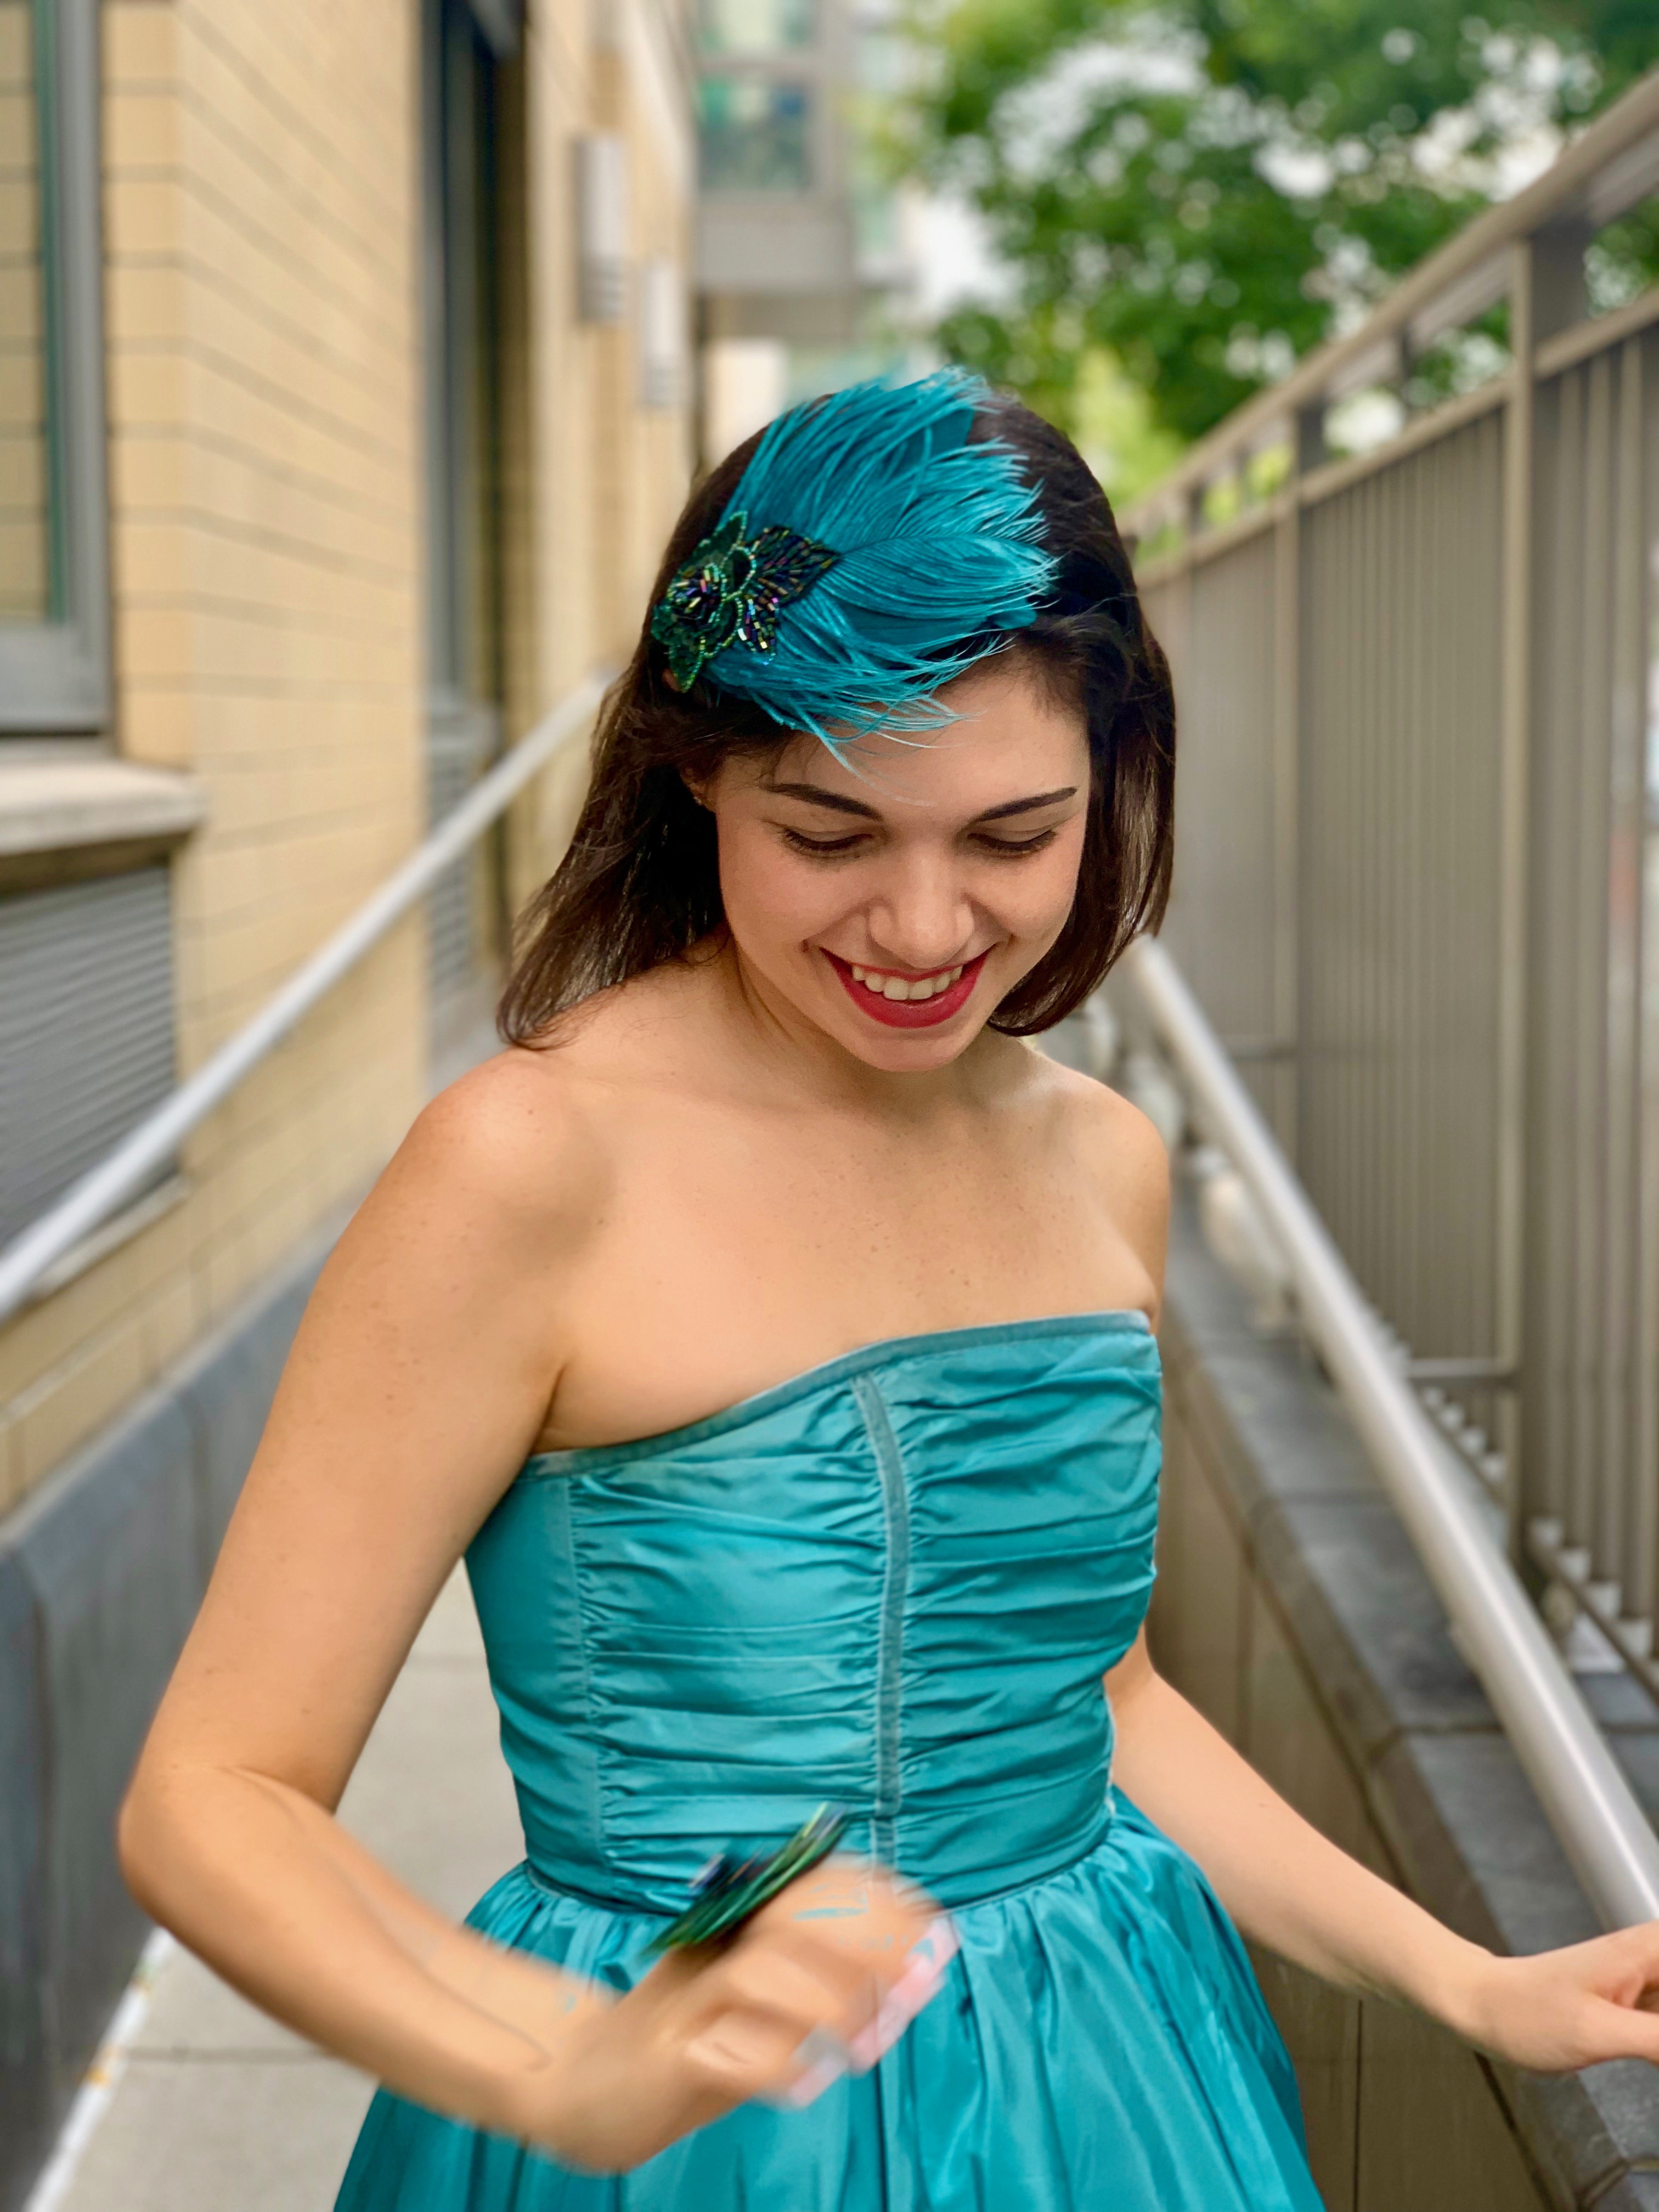
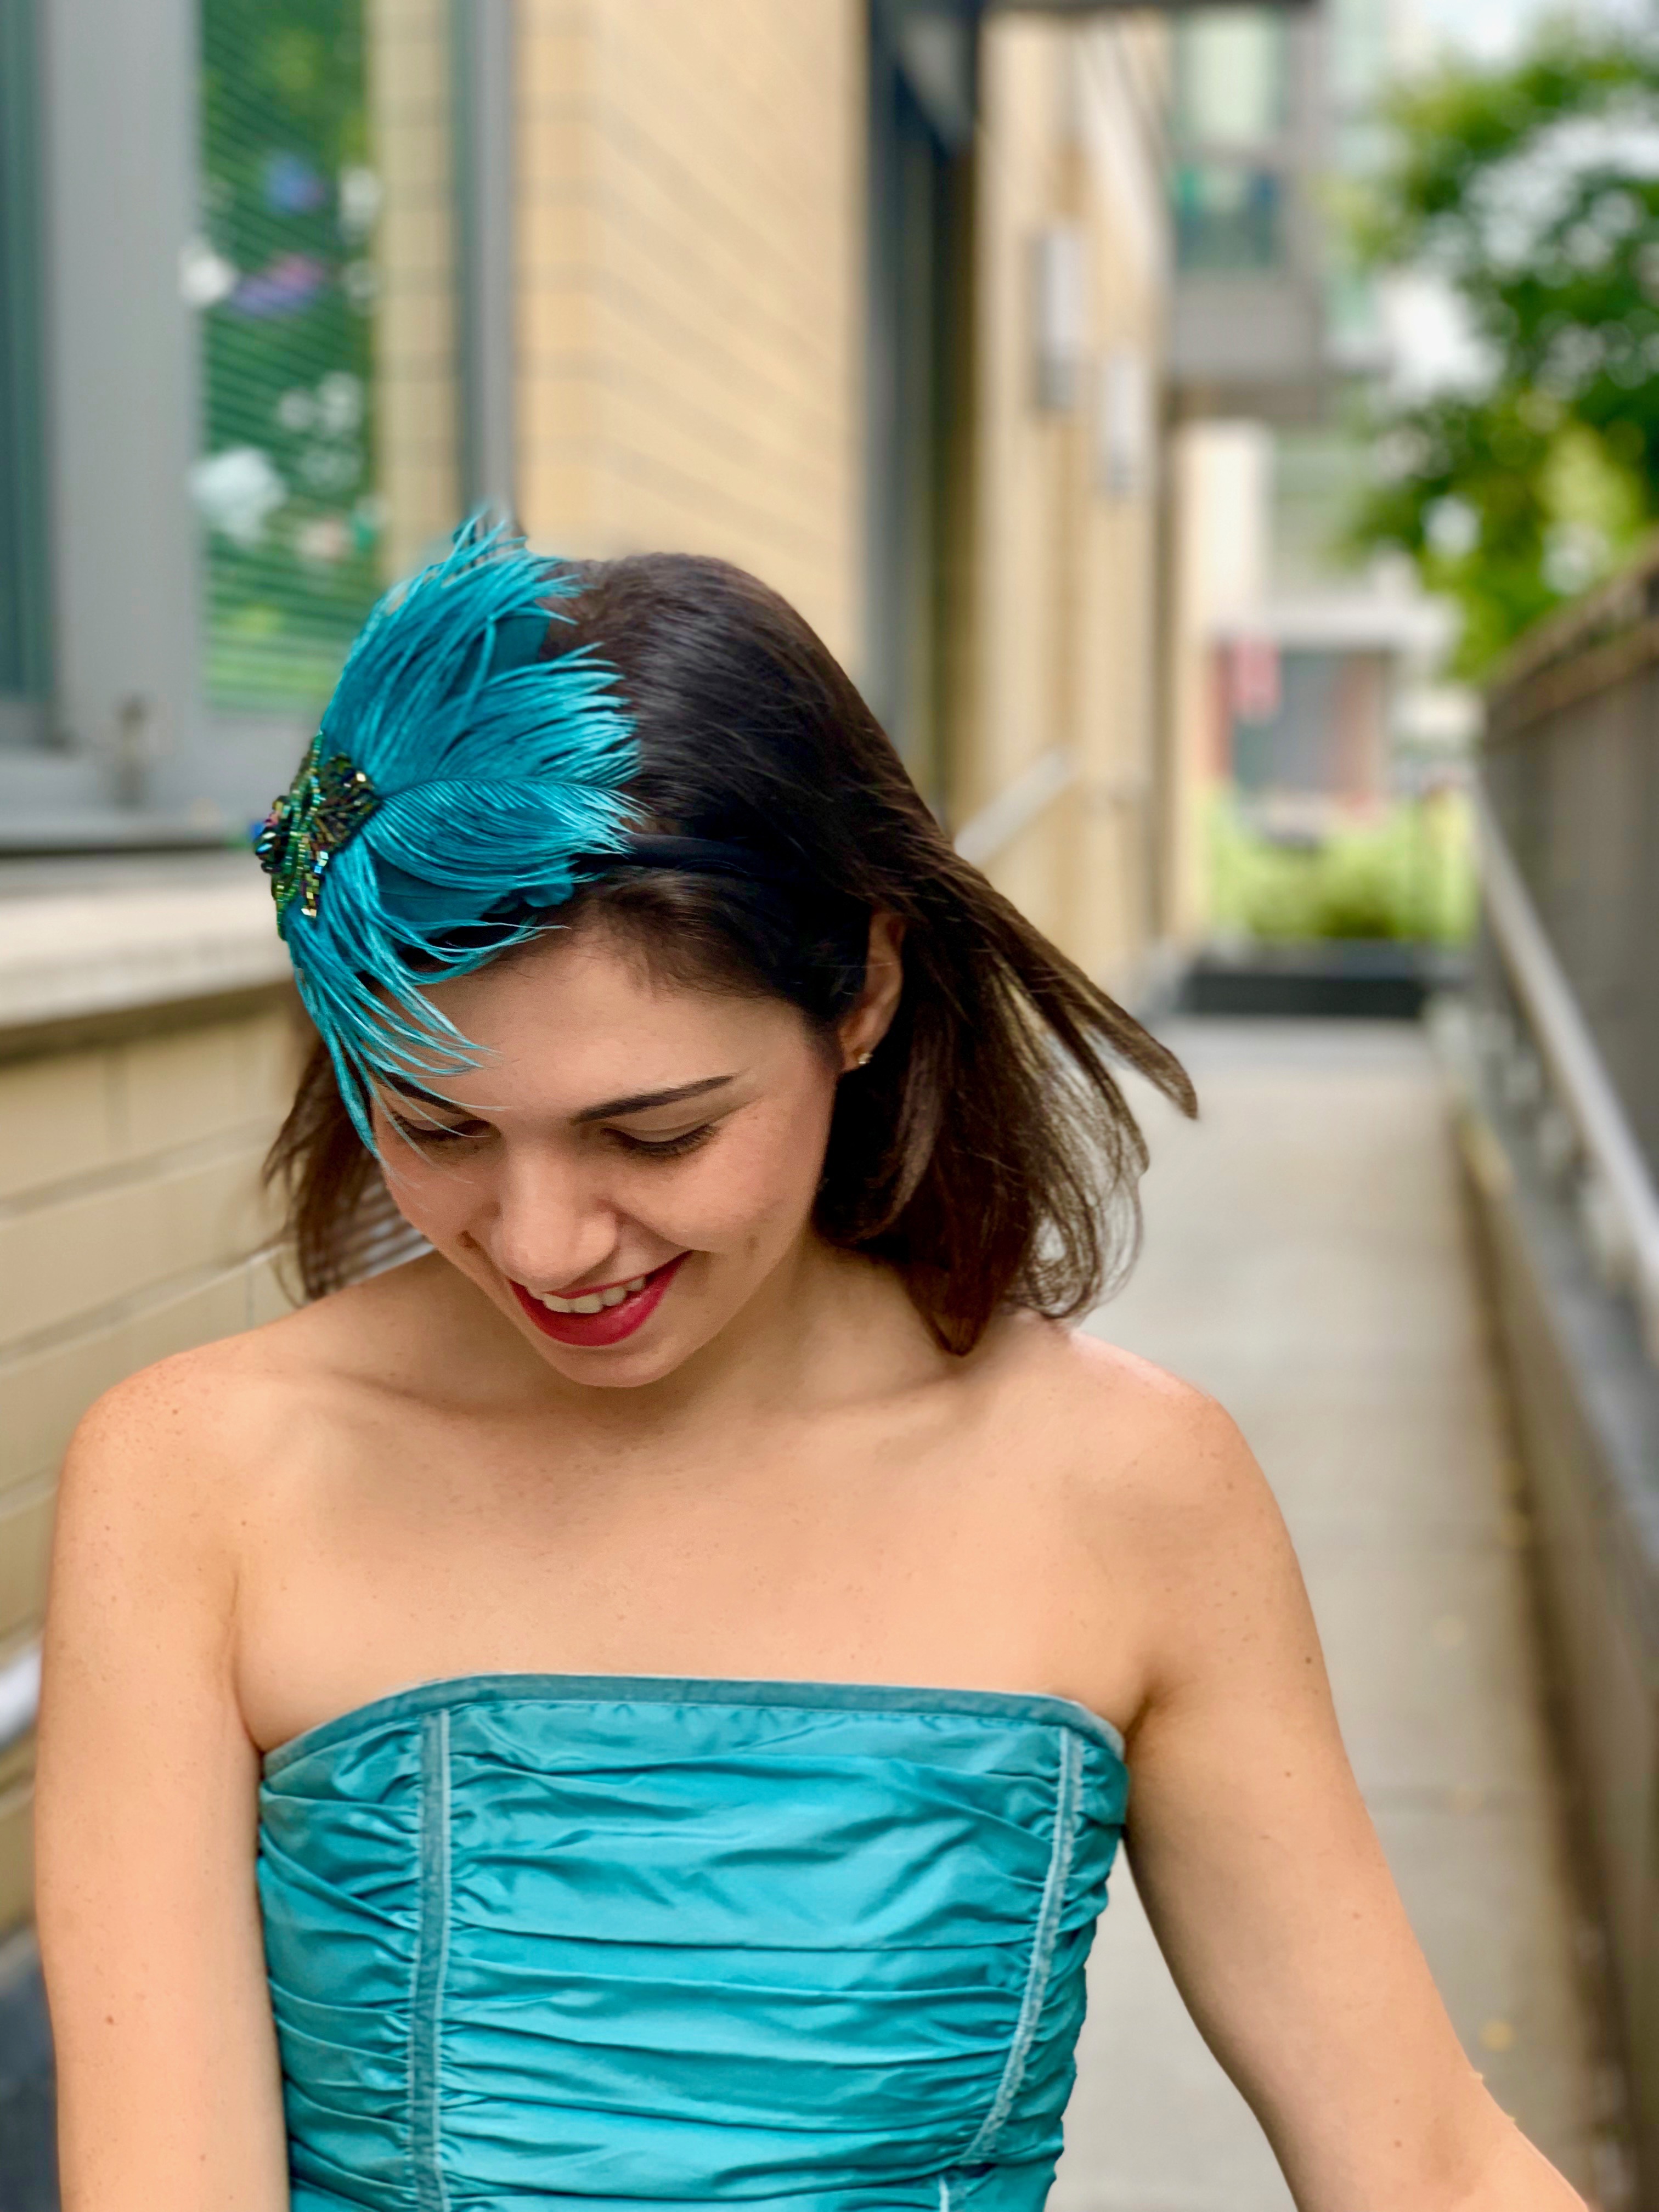
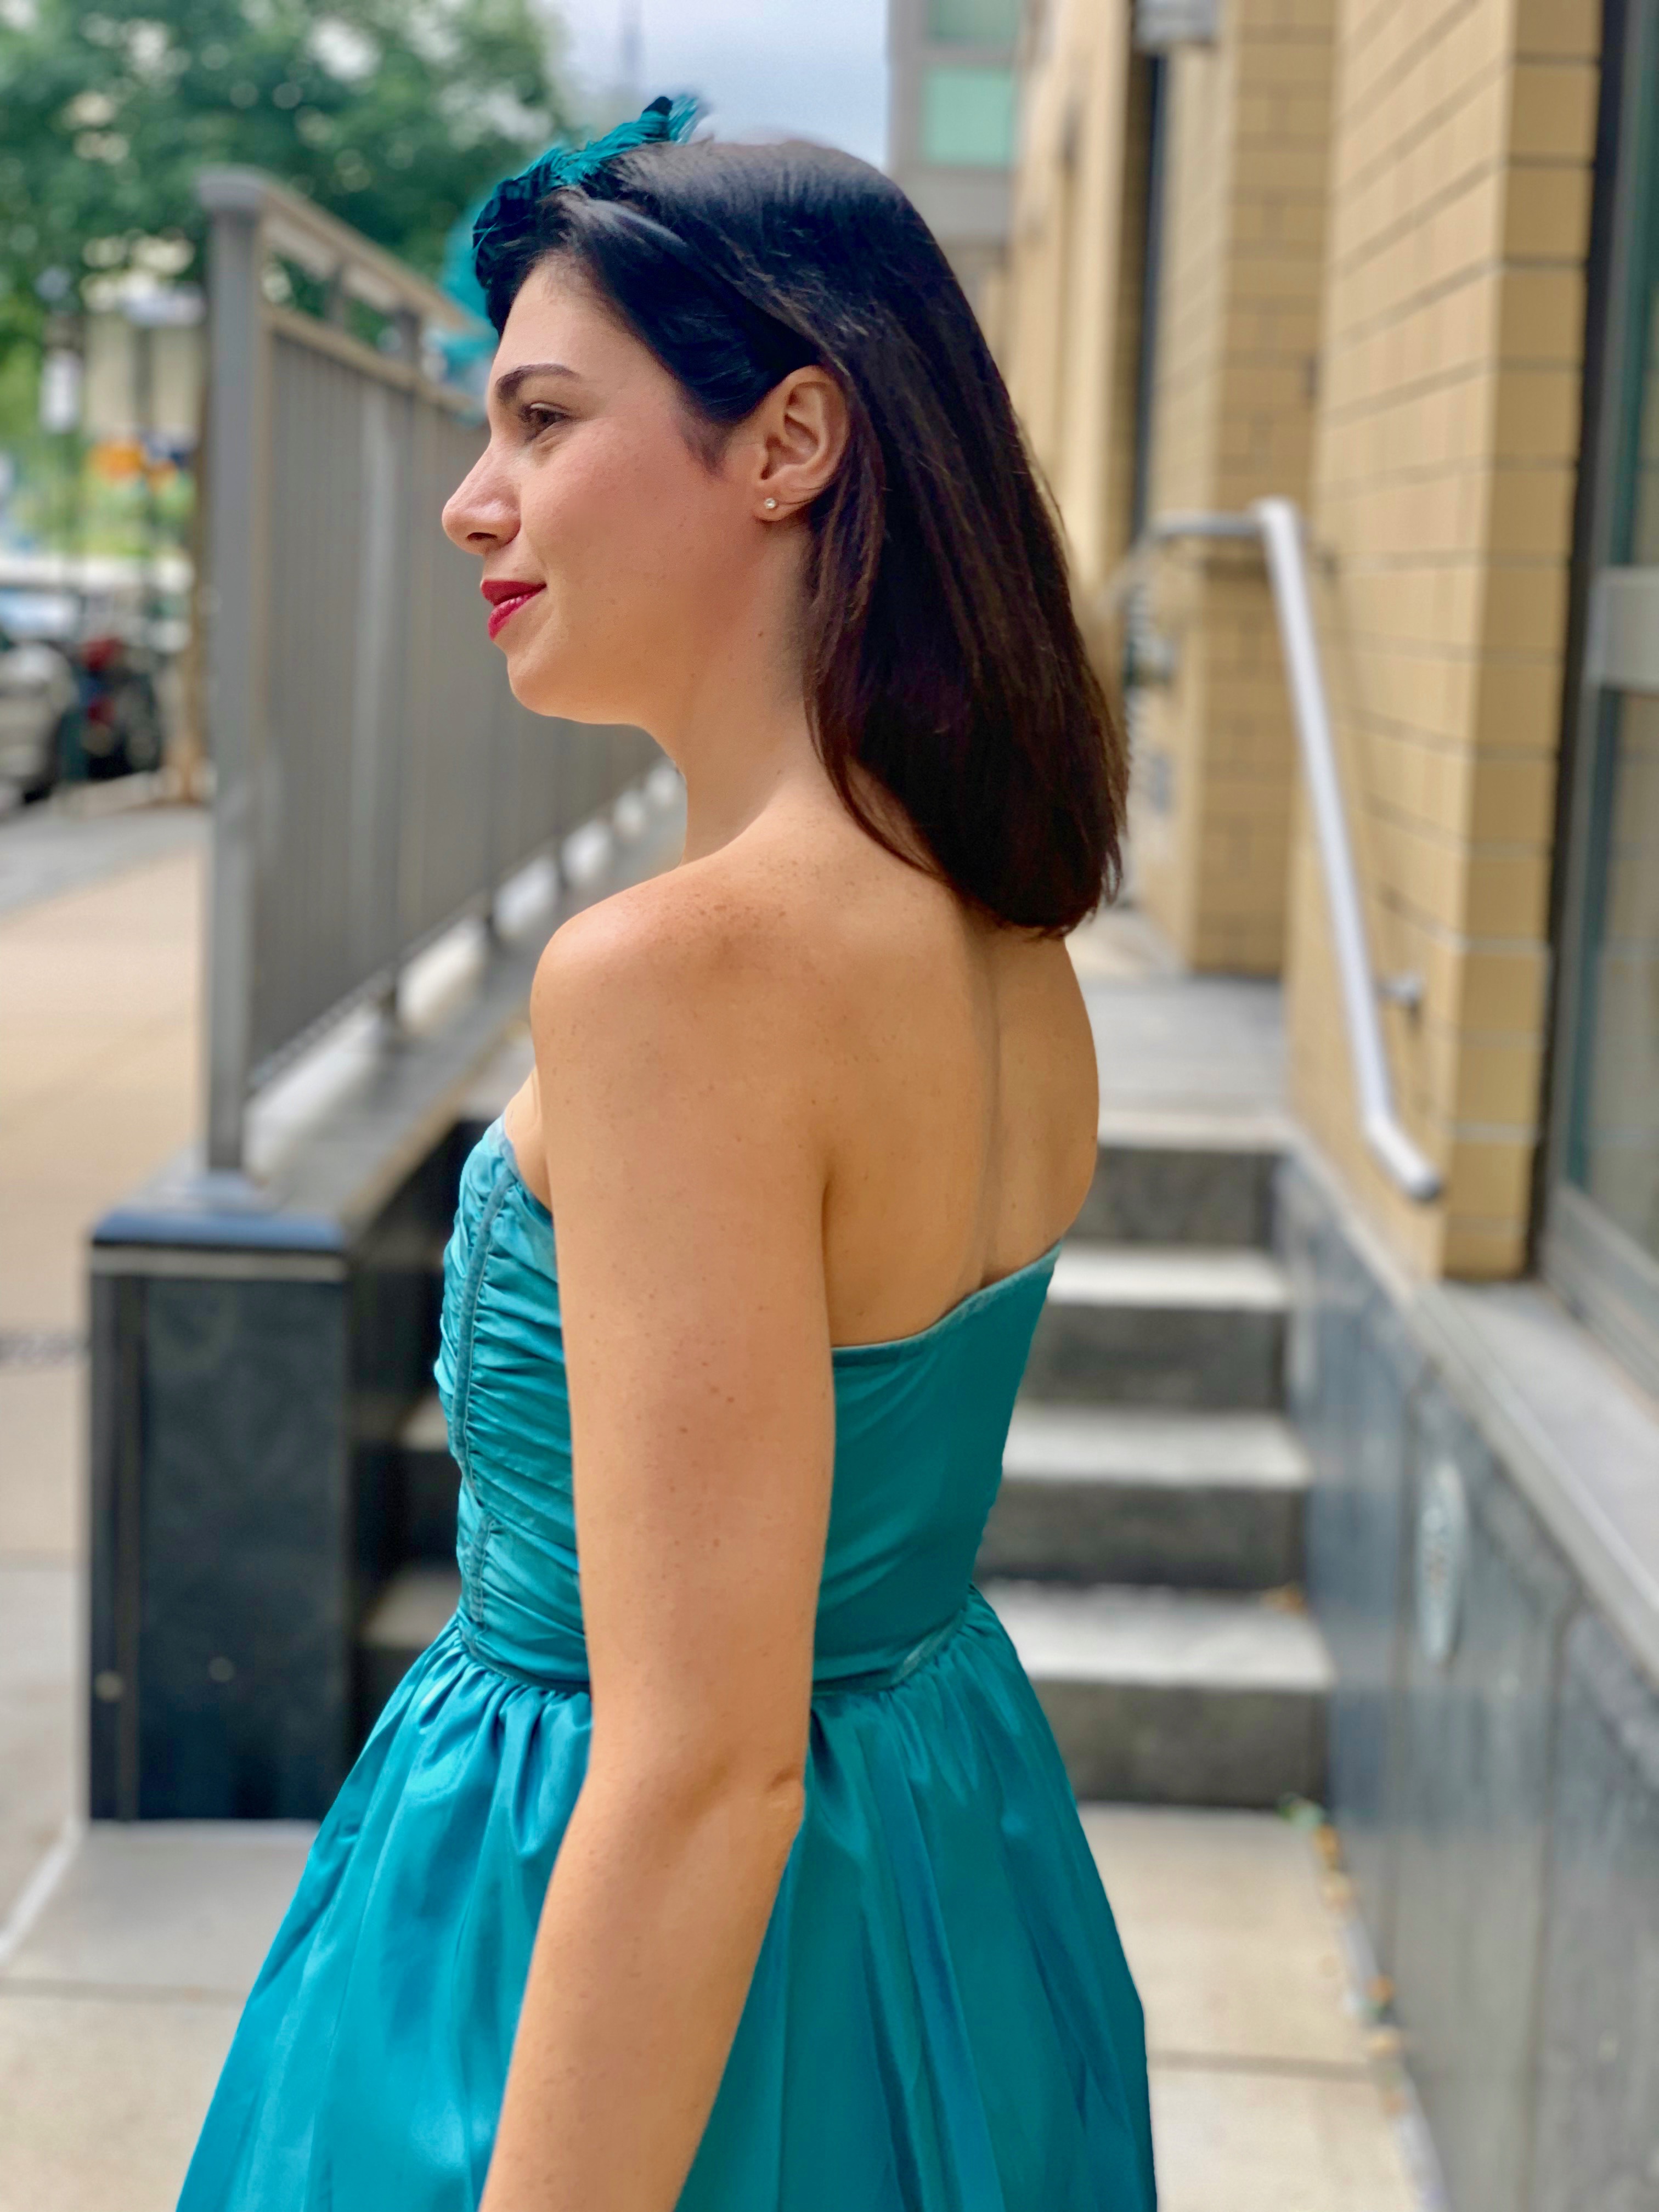
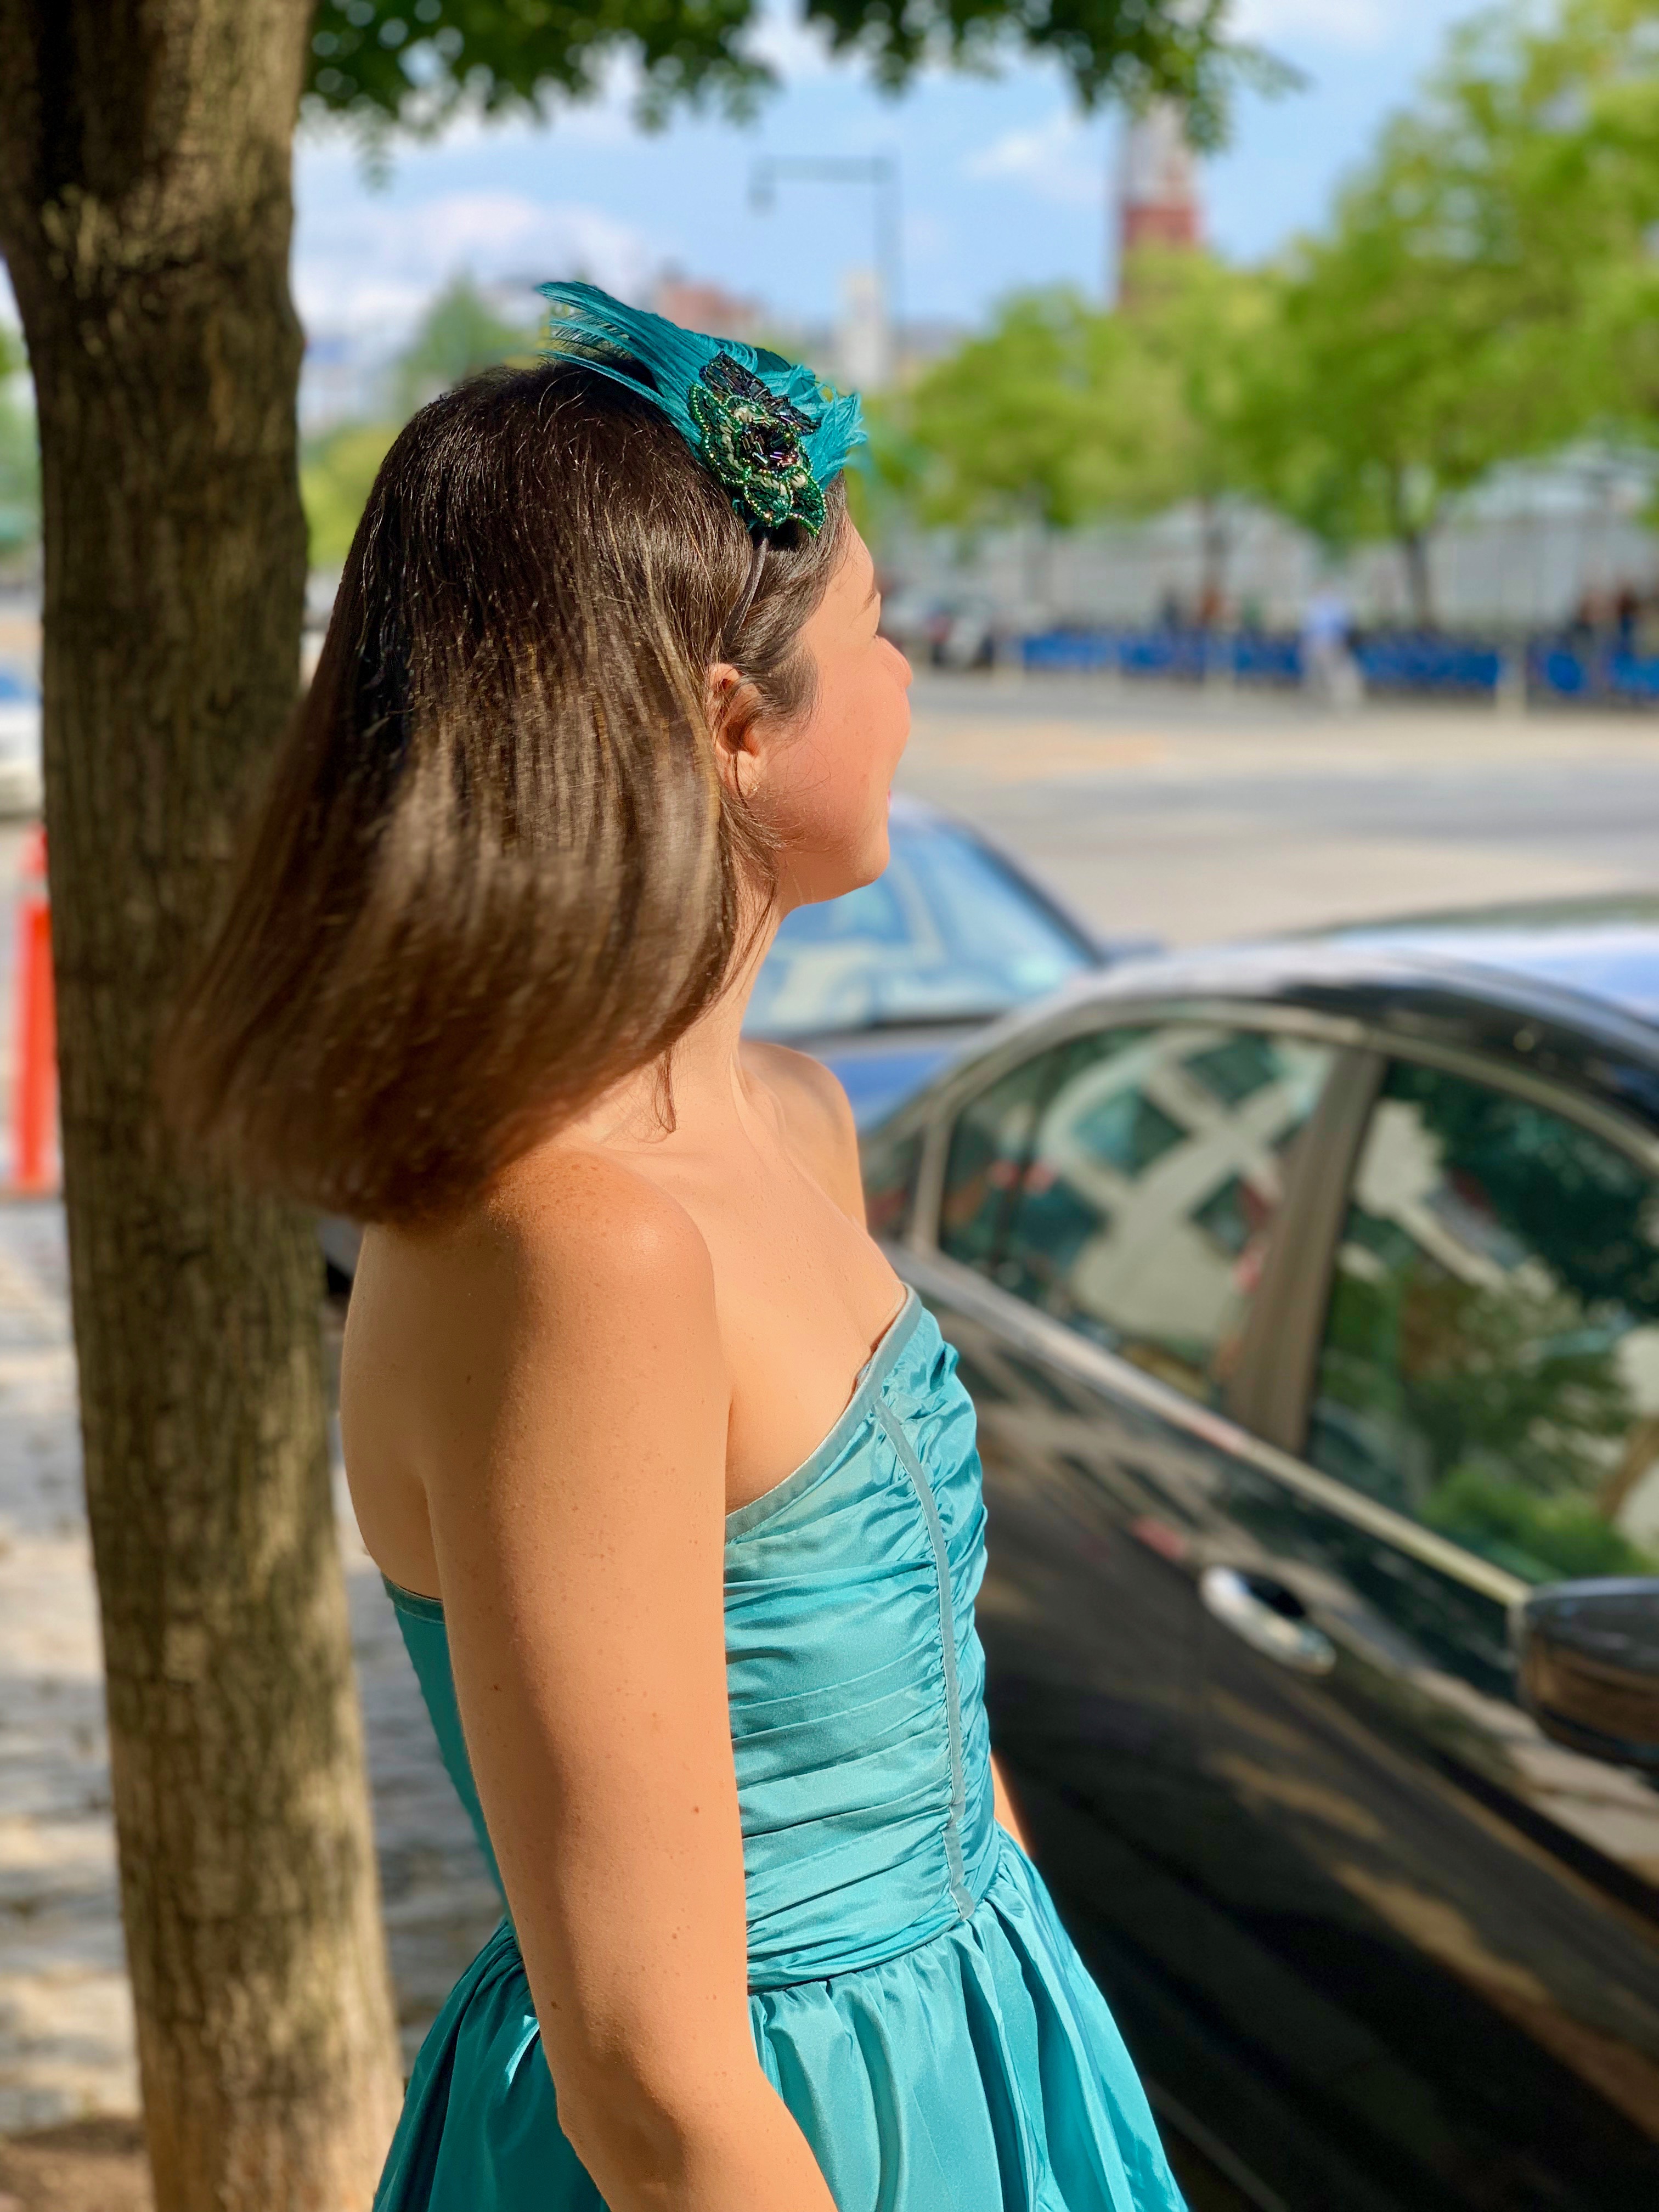
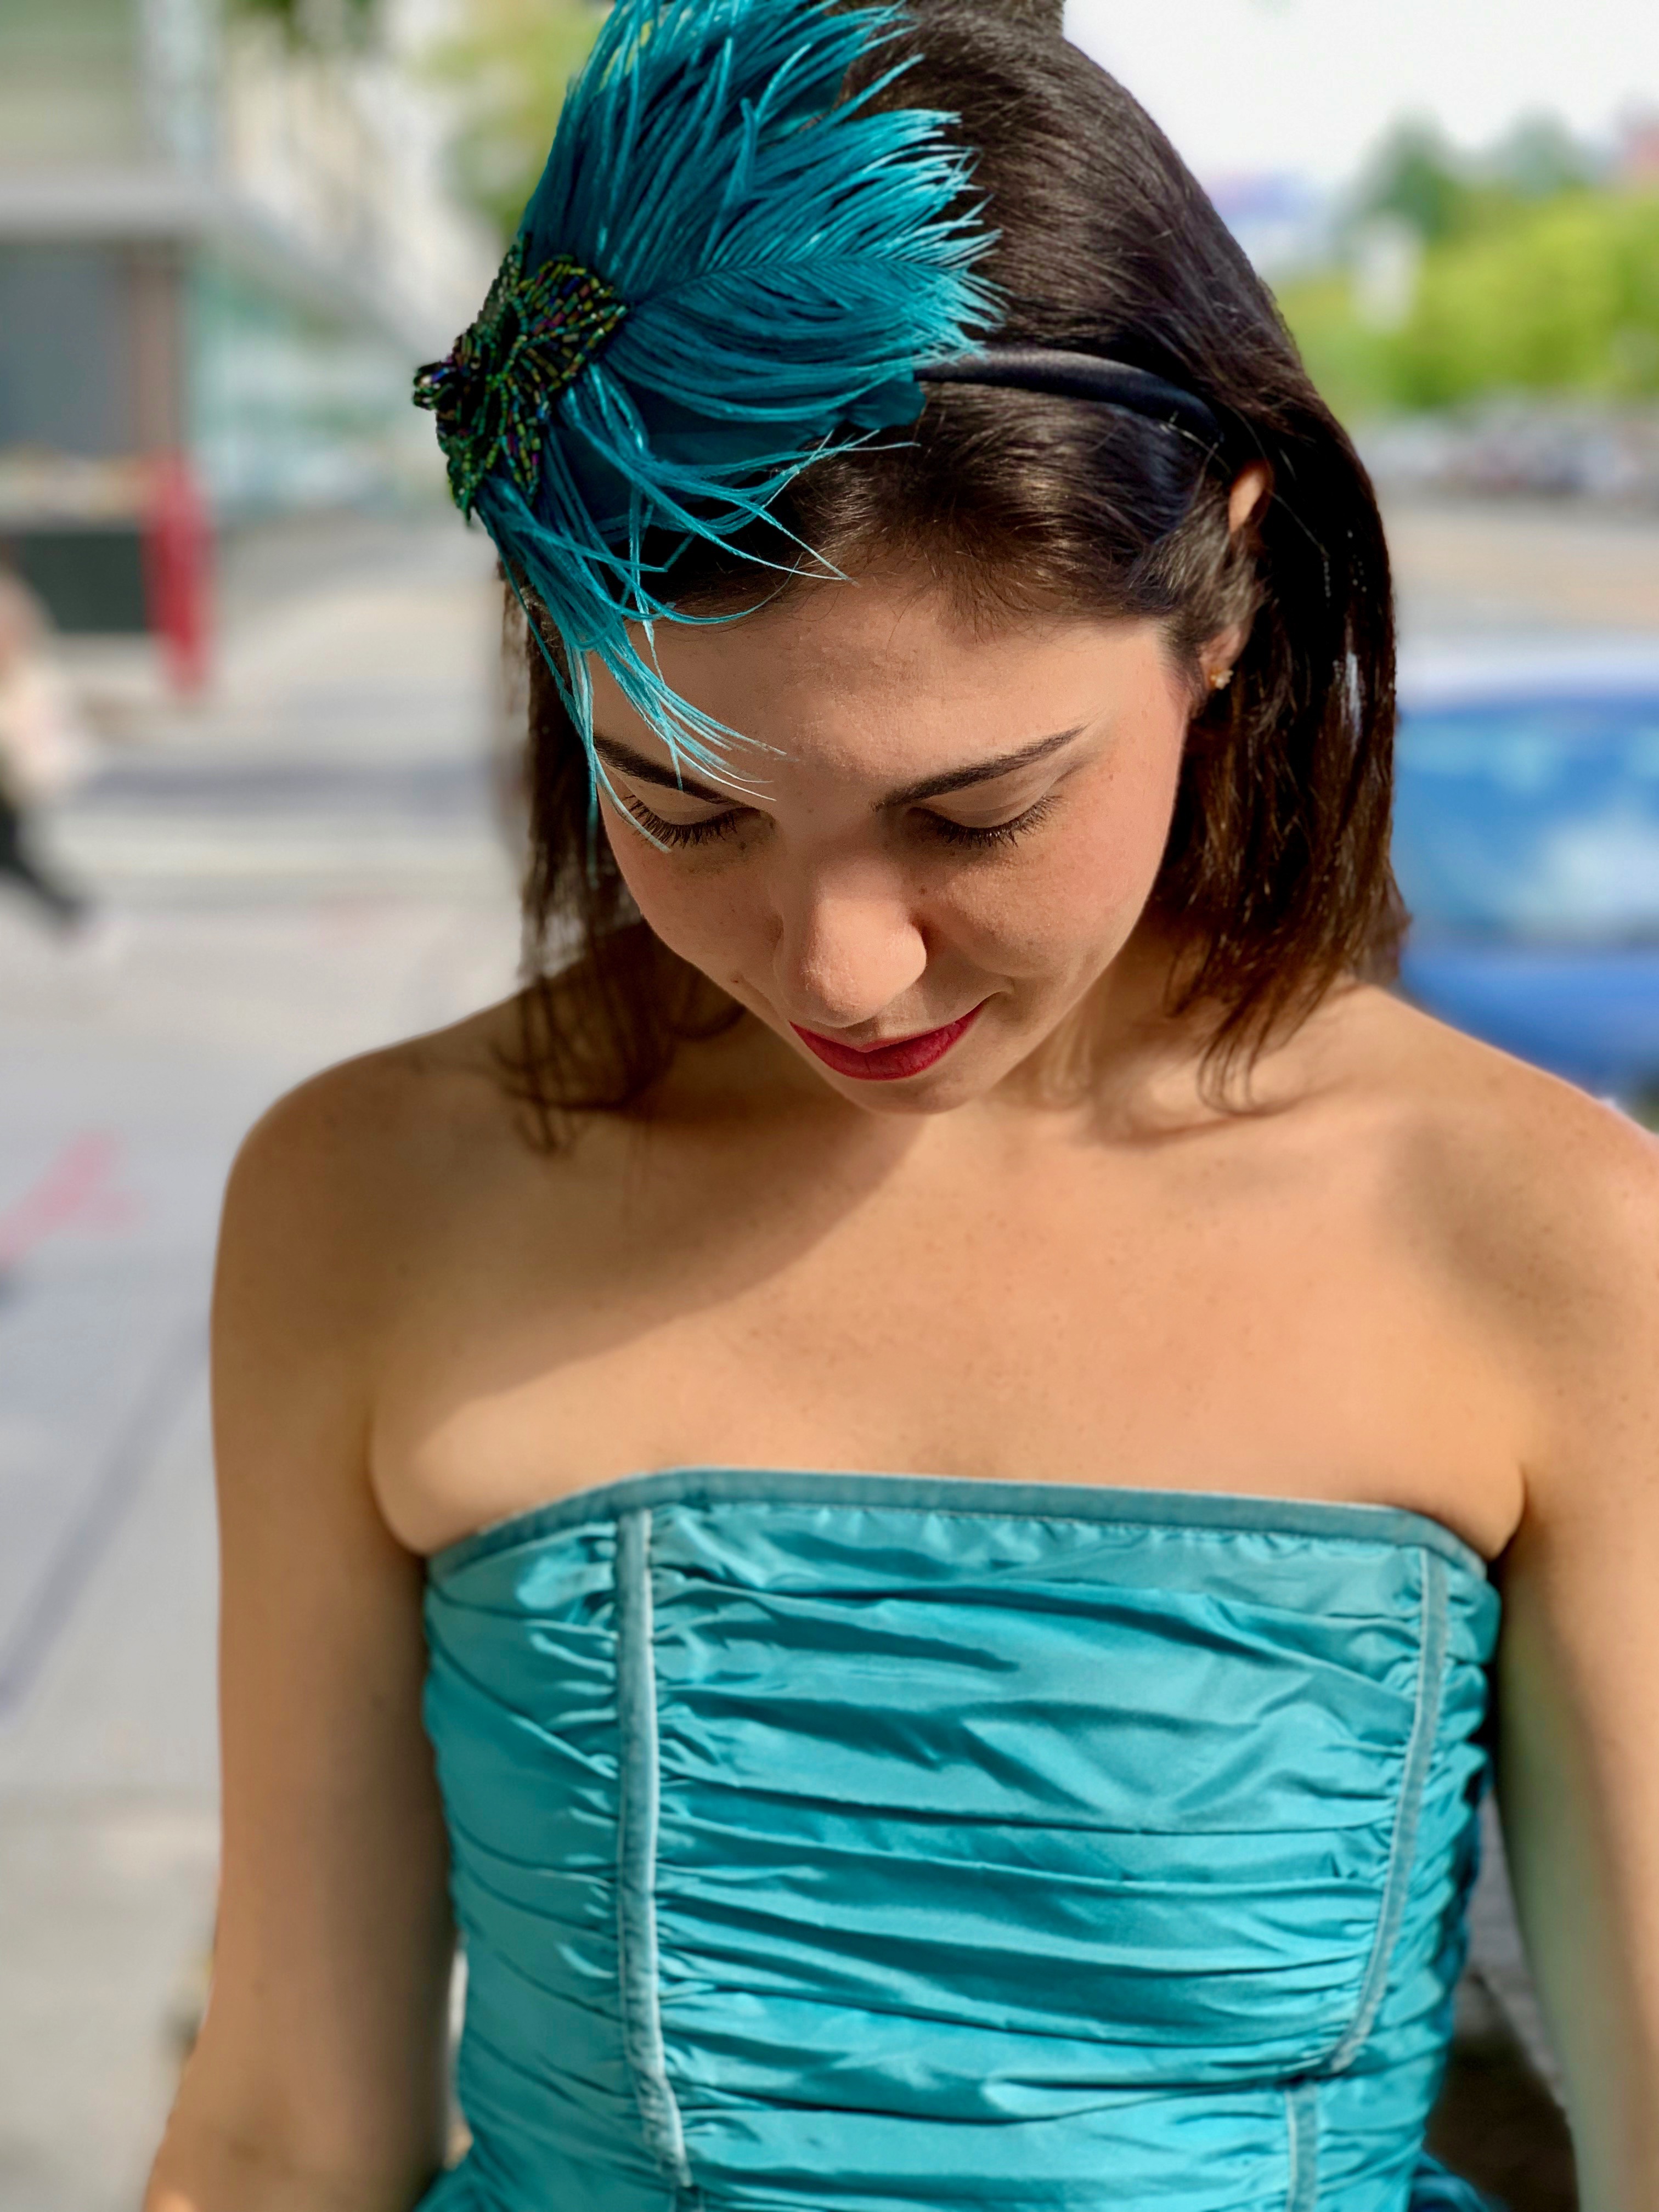
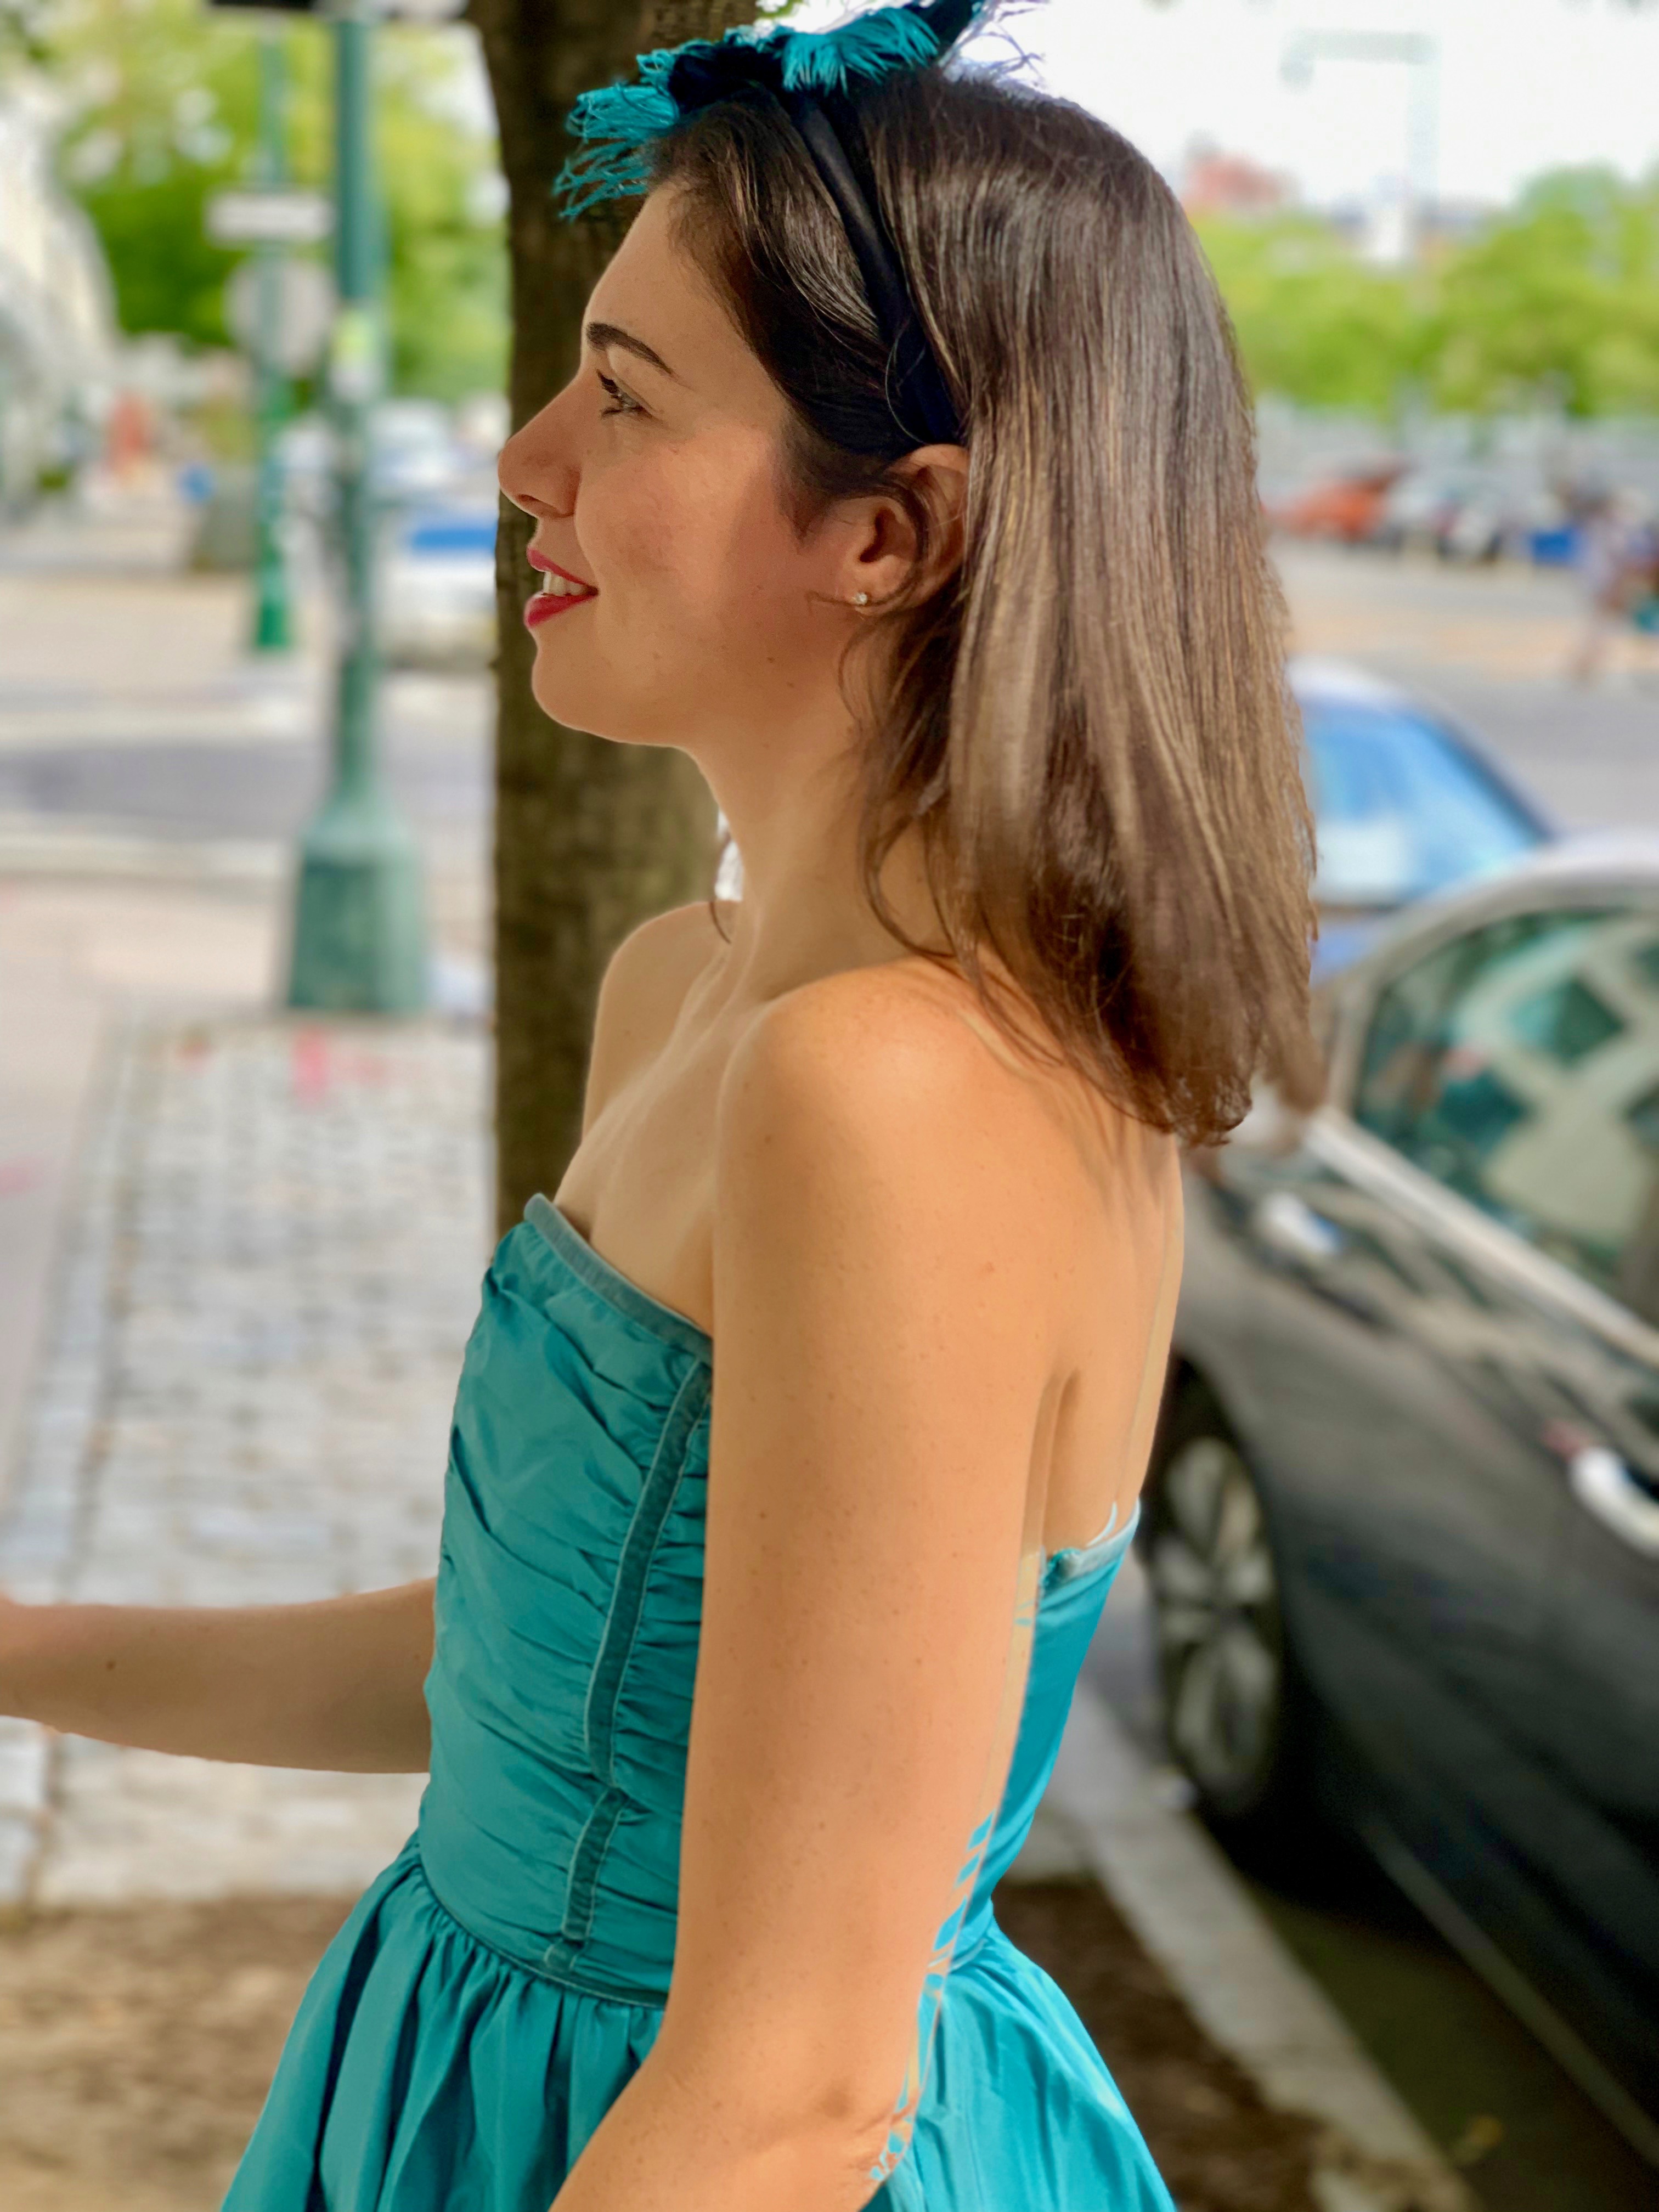
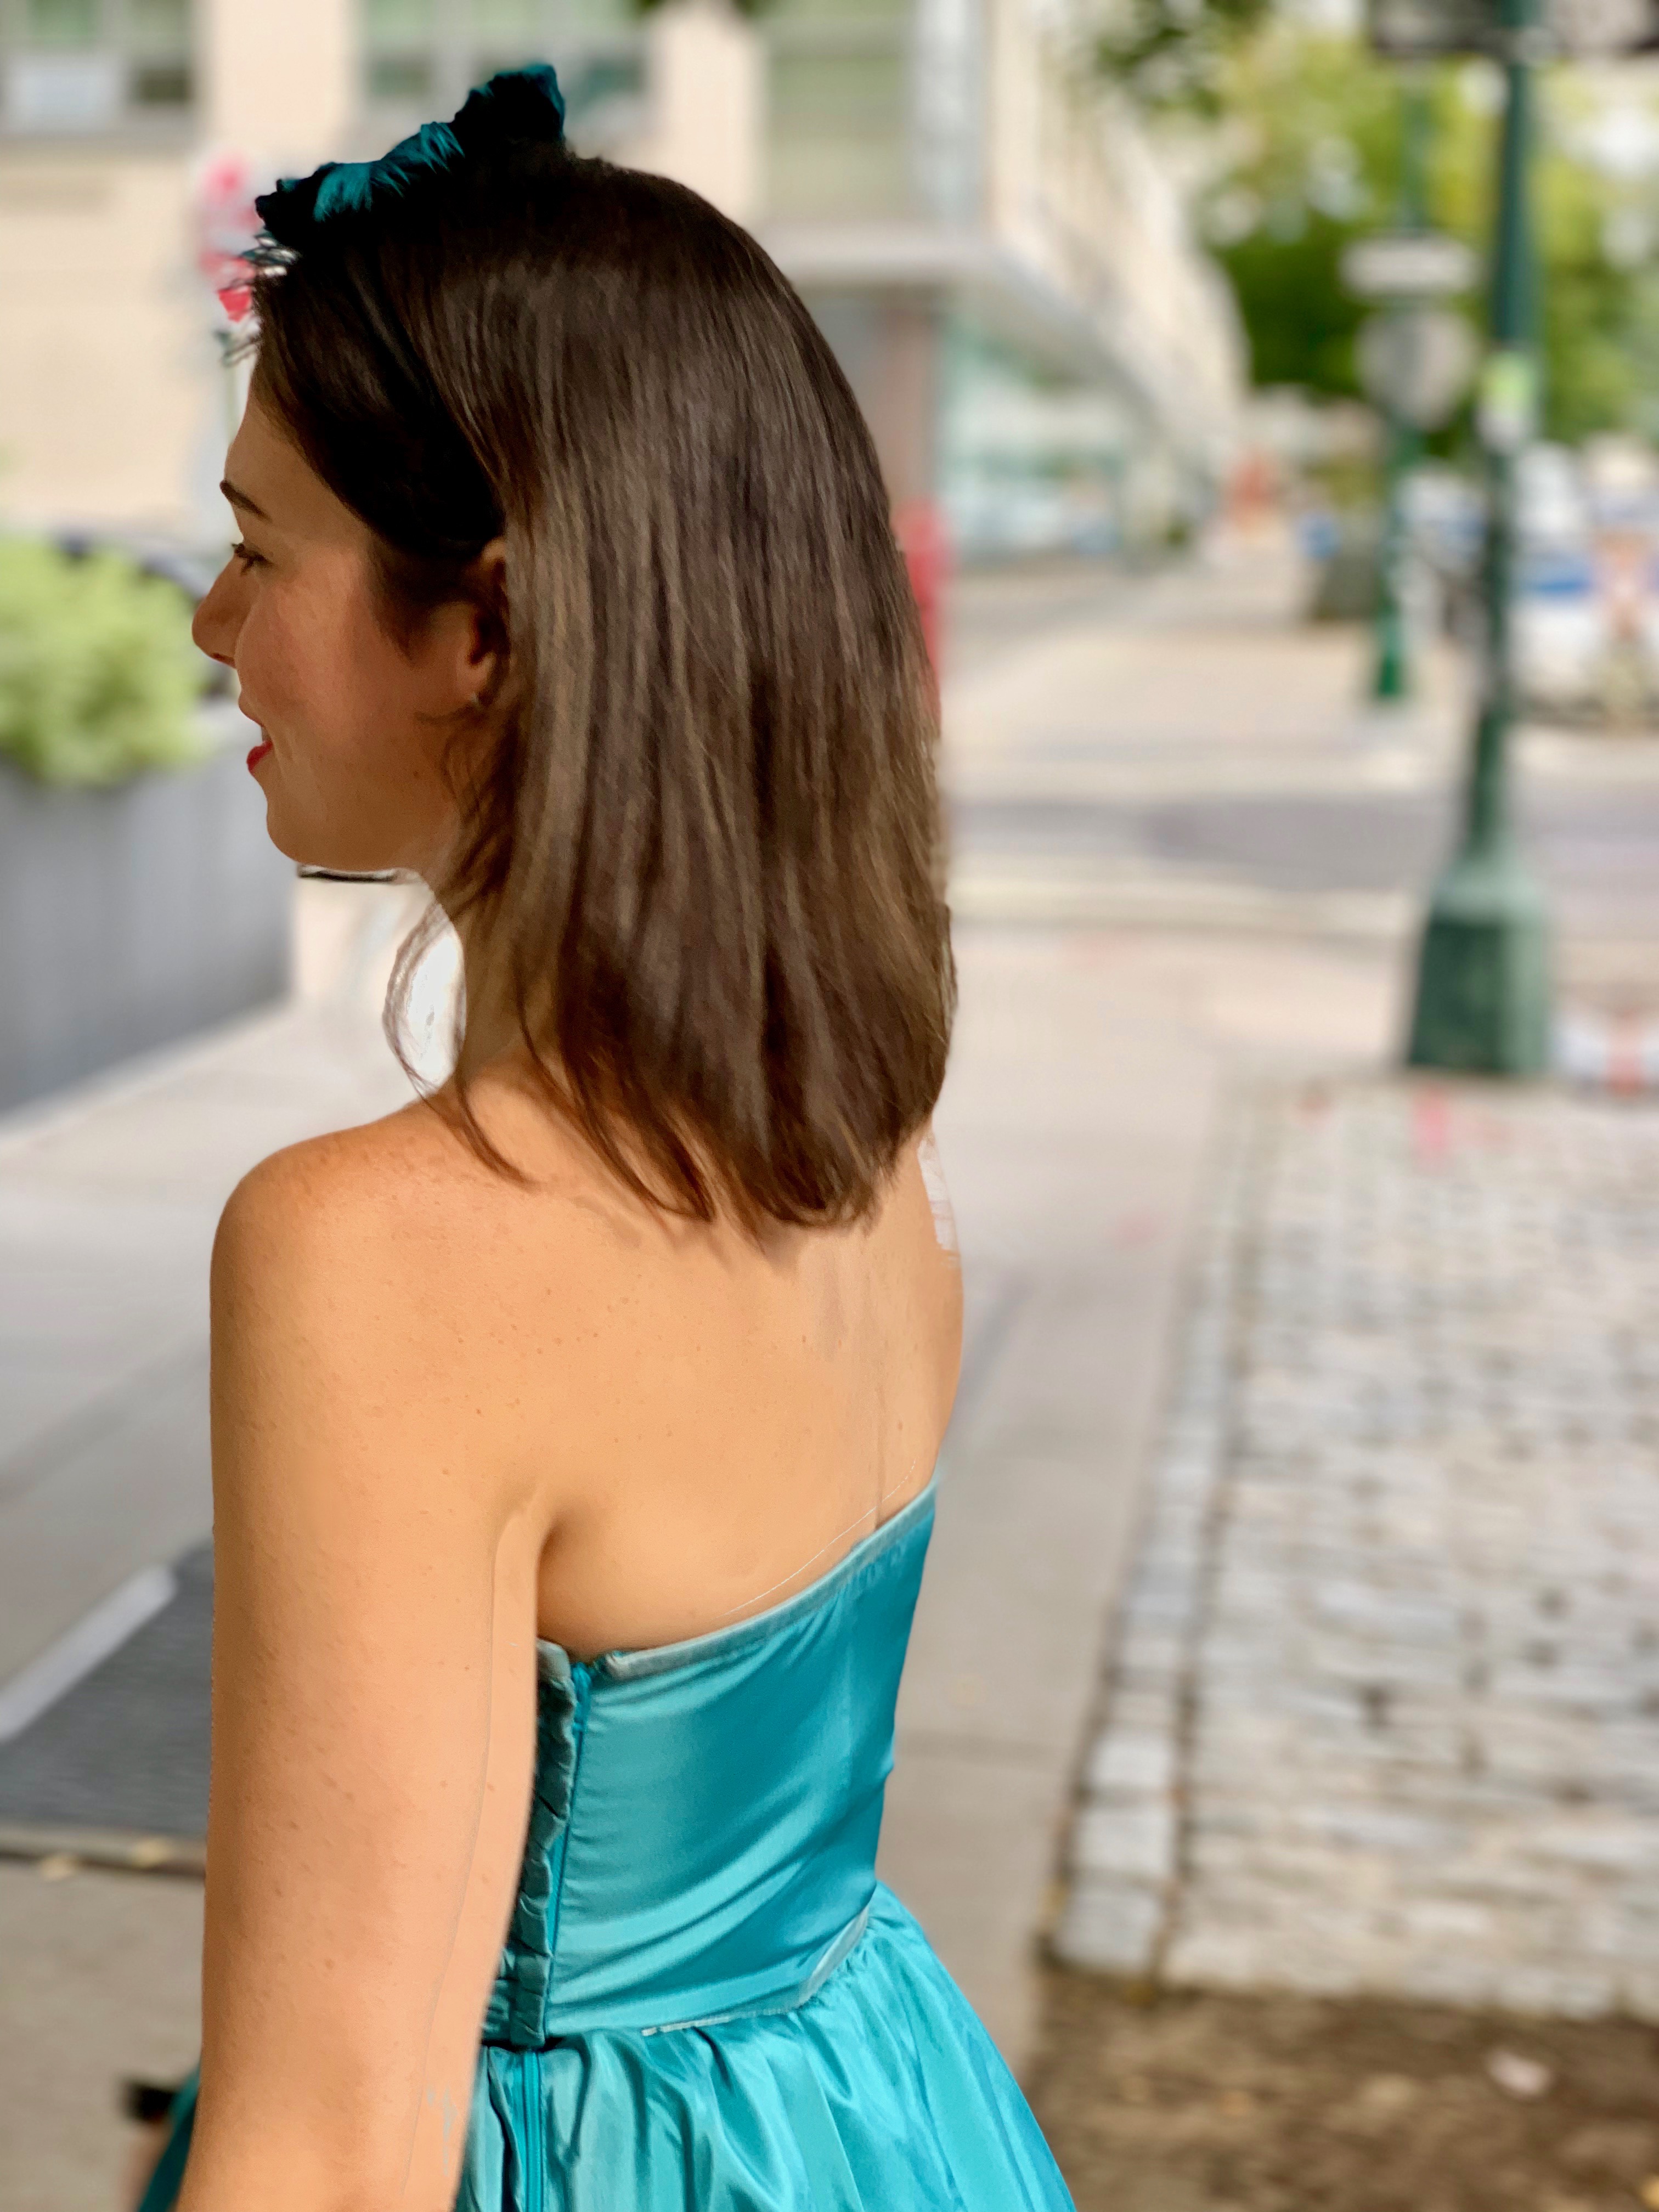
I knew she was going to be wearing a hot pink dress, so I bought her a pink feather fan, a pink boa, and I decided to make her a feathery, pink, Moulin-rouge inspired headband. I don't have any good photos of the pink headband I made in action from that night, so I decided to make a replica for myself in teal here. I even made myself a matching statement ring with the leftover materials. See instructions for the DIY headband below! I would do a DIY for the ring too, but I literally threw it together with some leftover floral trim and a small piece of foam sheet, so I will leave that out ;)
DIY Headband Materials:
- One plain headband - I ordered this pack of 50 from Amazon, and they were perfect! Will be using these for more projects in the future
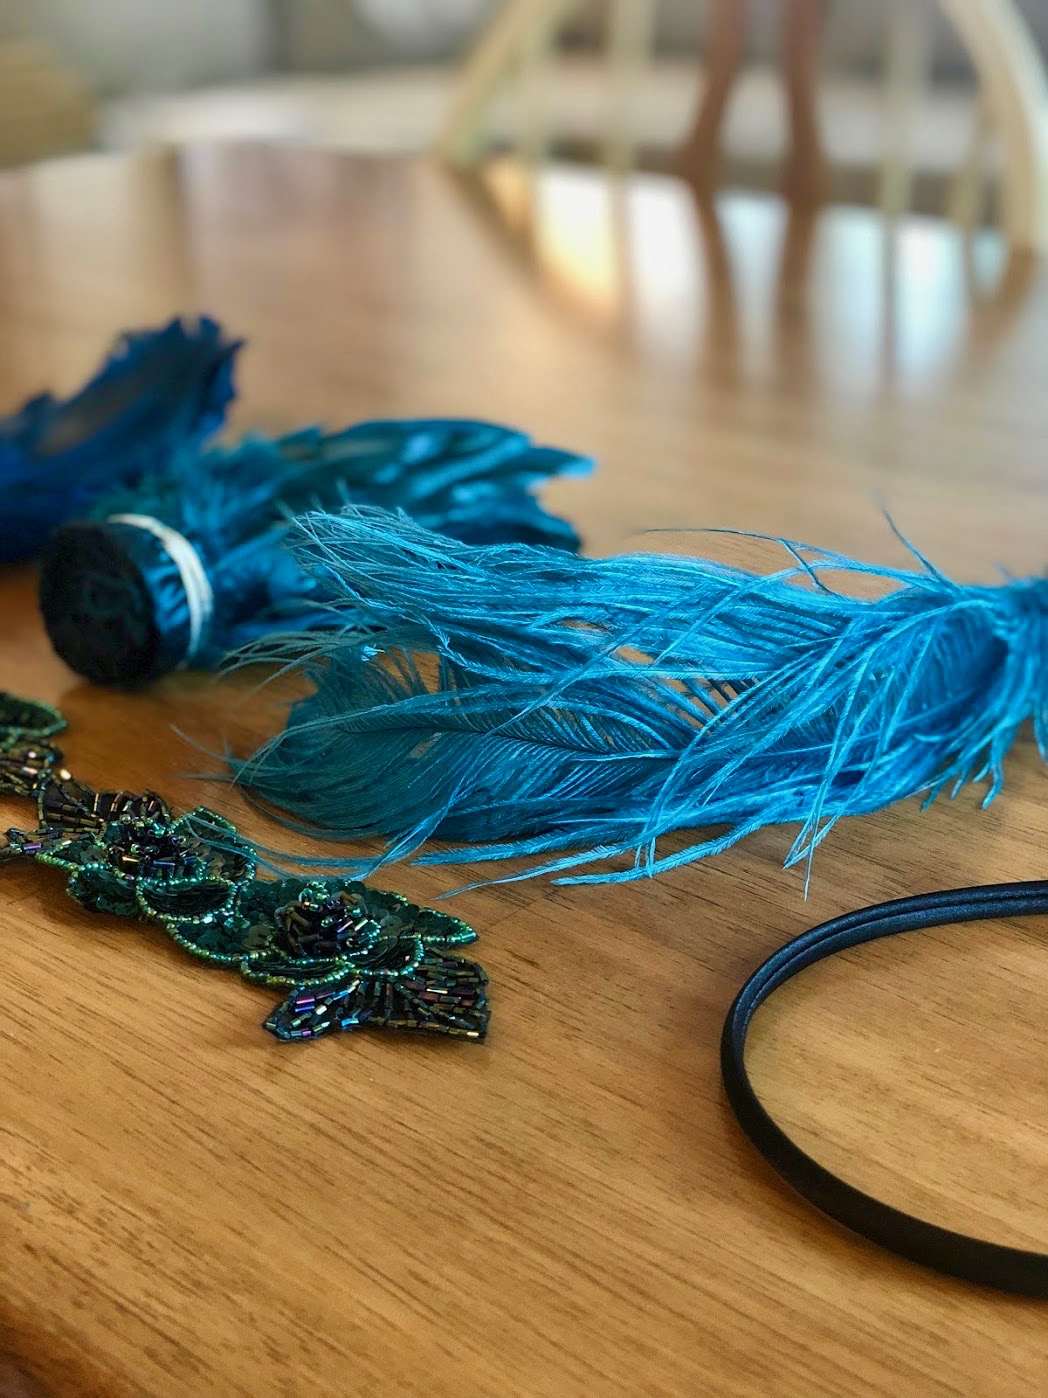
- 0.5 yd goose feather fringe or a single feather pad (in color of your choice) - I used this goose fringe from Hai Trim & Feathers in NYC
- One ostrich feather - I also got my ostrich feather from Hai Trim & Feathers
- 0.5 yd Decorative trimming - I used floral beaded trimming from either M&J or B&Q trimmings, again in NYC. Can't remember which one, and can't find the exact one I used online either!
- One black "peel & stick" felt sheet - You can pretty much get these at any craft store; here's just one example
- One black foam sheet - Again, these are available at pretty much any craft store; example here
- Hot glue gun with hot glue sticks - I used this one but they sell these at so many places, even at most dollar stores
DIY Headband Instructions:
- Cut a piece of the foam sheet in the shape of a petal. Make it roughly as big as you want the feather pad on the headband to be. (Note: there's a lot of "use your own judgement" in my DIYs, because I wing most of these myself! But I'm naturally a crafter so still able to make everything look perfect!)
- Hot glue individual feathers from the feather fringe (or the feather pad, if you bought one of those) to the foam petal. Be conscious of how you're placing the feathers or the feather pad. You want this to look good, not crazy
- Cut down your ostrich feather to the appropriate size (depending on how dramatic you want your headband to look). I would say I used ~6" of the top of my ostrich feather
- Hot glue the ostrich feather down onto the bed of feathers (I only applied glue to the spine of the feather)
- Cut a flower (or other decorative element) from the trim; hot glue that to the ostrich feather/feather bed situation
- Cut a petal roughly the same size, or slightly smaller than, the foam sheet petal, from the "stick and peel" felt sheet
- Place the feathered headband topper atop the headband (I prefer slightly off-center, so the feathers sit on the side of your head, rather than right on top); once you get a positioning you life, peel the back lining off the felt sheet so the adhesive is exposed, and place it underneath the headband, so that the headband is sandwiched between the foam sheet base of the feathers and the adhesive side of the felt sheet.
- Press down on the adhesive side of the felt sheet, so the feathered foam pad is securely attached to the headband
- You should now be able to comfortably and securely wear your handmade headband!
While this particular headband looks pretty costume, you could definitely make a toned down version for an everyday look. I used to wear feathered headbands that had the same kind of shape, but were a bit simpler (kind of like this) all the time in the late 2000s. OR, you could make something more extra than I did, like Carrie Bradshaw's iconic wedding-day feather (#obsessed) using the same basic process. Maybe I'll have to add that Carrie Bradshaw headpiece to my list of future projects!
Hope you like this DIY, and thanks for reading!